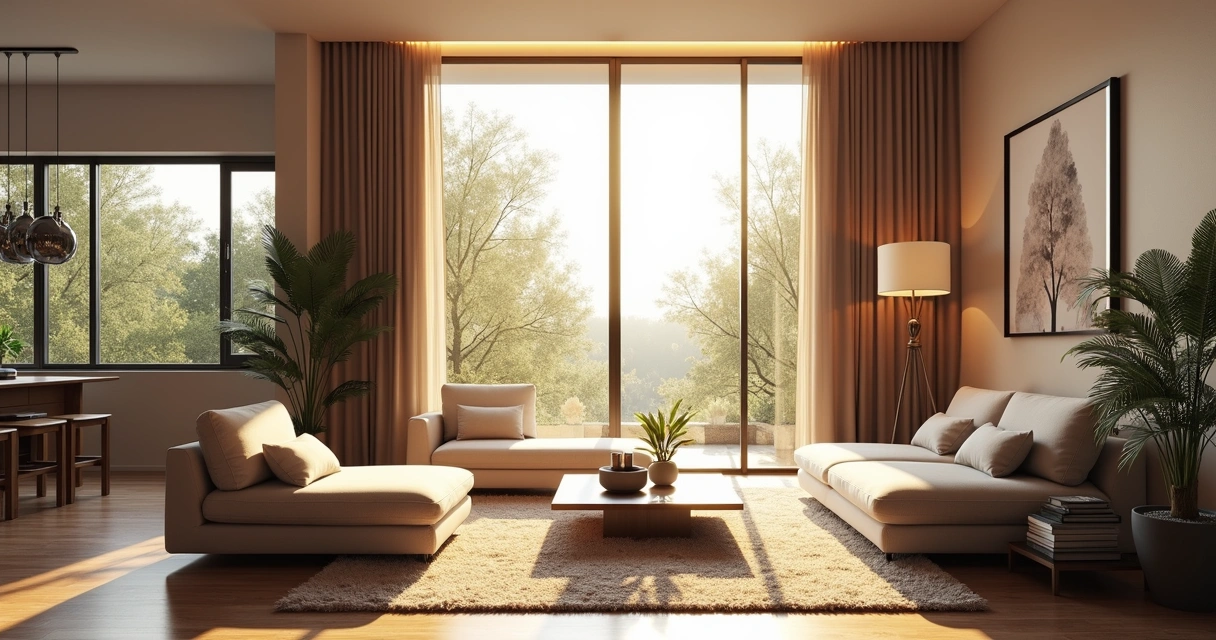
Insights Redraw
Redraw Updates and Trends
What's new in AI for architectural visualization.


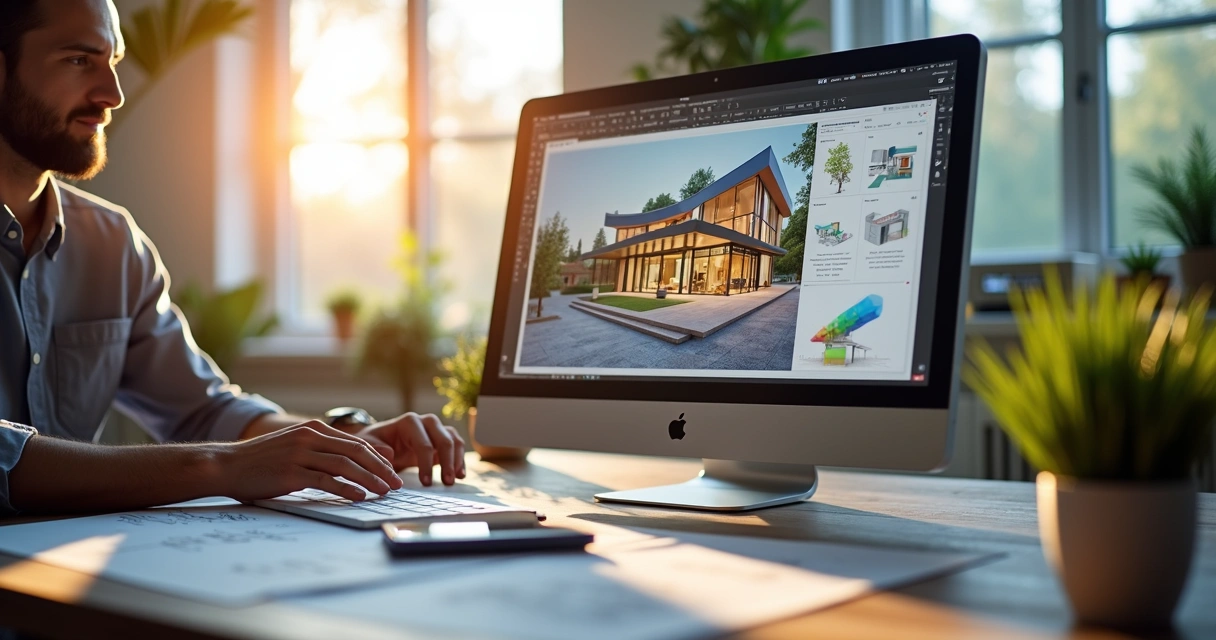
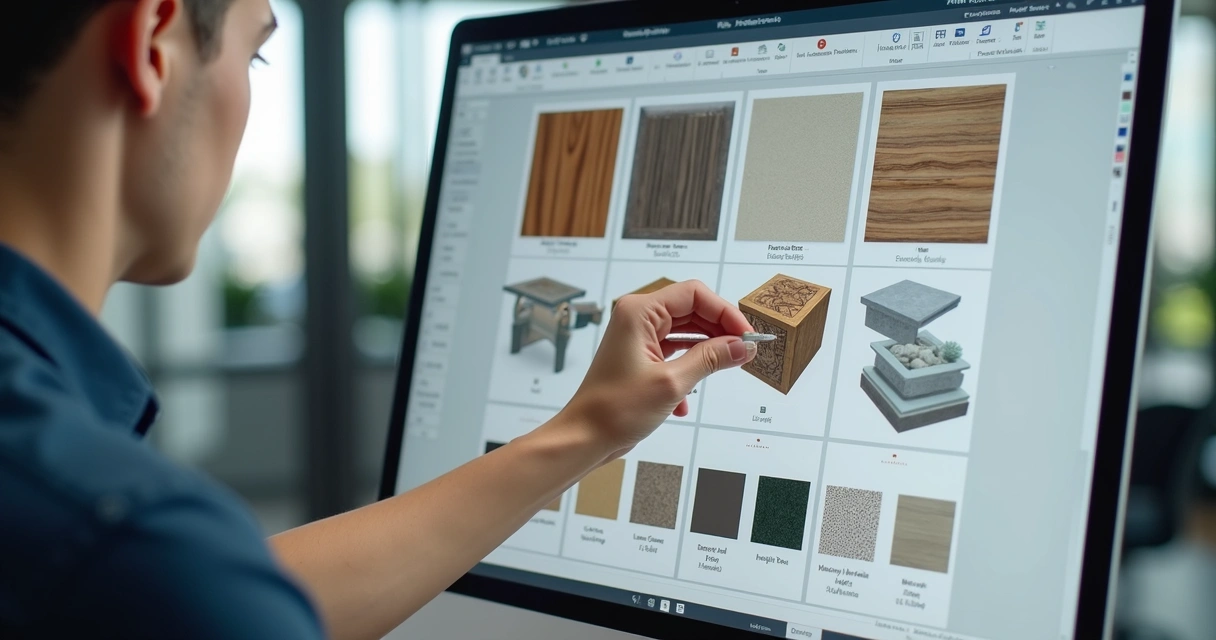
AI for SketchUp: 10 Plugins and Tools Every Architect Needs in 2026
AI for SketchUp in 2026: the 10 plugins and tools every architect needs. From modeling to photorealistic rendering in 30 seconds.

SketchUp is the most popular modeling software among architects in Brazil and worldwide. Easy to learn, fast to use, and with a plugin ecosystem that lets you do practically anything. But SketchUp alone has limitations. It's through plugins and external tools that it transforms from a "massing software" into a complete professional tool.
In 2026, AI entered this ecosystem with force. And the best part: the most powerful AI tool for SketchUp is not a plugin. It's easier than one. But before we get there, let's cover the essential plugins every architect should know.
Modeling plugins: SketchUp at its best
These plugins solve native SketchUp limitations and give you more control over modeling.
1. Curviloft
SketchUp struggles with organic shapes. Complex curves, flowing roofs, facades with non-linear geometry. Curviloft solves this. It creates surfaces from curves, smooth transitions between different profiles, and shapes that native SketchUp simply cannot produce. For architects designing contemporary buildings with curves, it's indispensable.
Free.
2. SubD (Subdivision Surfaces)
SubD adds subdivision modeling to SketchUp. You create a simple shape (low-poly) and the plugin smooths it in real time, generating complex organic surfaces. The trick is that you work on the simple model (fast and lightweight) and switch to the smoothed version when you need to see the result. Keeps the file light while allowing advanced geometries.
Paid (~$39).
3. Profile Builder
Creates custom profiles (baseboards, moldings, channels, metal profiles) and applies them along any path. Instead of manually modeling each detail, you define the profile once and the plugin extrudes it wherever you need. Saves hours in detailing work.
Paid (~$49).
4. Skatter 2
The most powerful scatter plugin for SketchUp. Vegetation, street furniture, stones, tiles — any object that needs to be repeated at scale. Skatter distributes objects across surfaces with control over density, random rotation, and region exclusion. It turns landscaping and urban scenes that would take hours into minutes.
Paid (~$69).
5. CleanUp³
Models imported from DWG, Revit, or other software arrive in SketchUp full of unnecessary geometry. Duplicate faces, stray edges, repeated materials. CleanUp clears everything automatically. Reduces file size, improves performance, and prevents problems at render time.
Free.
6. Solid Inspector²
Before exporting for 3D printing or any boolean operation, the model needs to be solid. Solid Inspector checks and automatically fixes geometry issues: reversed faces, internal edges, holes. It's the "doctor" for your model.
Free.
7. PlaceMaker
Draw a rectangle on the map and PlaceMaker imports 3D terrain, surrounding buildings, satellite imagery, and elevation data. It does in 2 minutes what would take a full day of manually modeling urban context. For site studies and shadow analysis, it's transformative.
Paid (~$100/year).
8. Skalp
Generates sections and elevations with hatching directly in SketchUp. For those who need technical drawings without leaving the software, Skalp creates sections with material patterns (concrete, earth, insulation) that update automatically when the model changes.
Paid (~$59).
AI plugins for SketchUp: what exists (and what's missing)
9. Redraw: the AI tool that isn't a plugin (and is better than one)
Redraw is not a SketchUp plugin. Nothing needs to be installed. And that's exactly why it works better.
The workflow is simple: take a screenshot of the 3D view in SketchUp, open Redraw in your browser, upload the image, and in 20 to 40 seconds receive a photorealistic render. Works with any version of SketchUp (Free, Go, Pro). No plugin compatibility required. No file weight added. No crashes.
AI plugins like SketchUp AI Render and Veras need to read the 3D geometry of the model, which creates version dependency, compatibility problems, and technical limitations. Redraw skips all of that. It works with the visual image of the model — which is what the AI actually needs.
And the result is superior. Redraw has proprietary models trained for architecture that understand materiality, natural lighting, and proportion. It's not generic AI with an architecture skin. These are models that know the difference between porcelain tile flooring and a wood deck, between sunset light and artificial lighting.
Inside Redraw, beyond the proprietary model, you access ChatGPT optimized for rendering, optimized Gemini, Nano Banana. You can generate project video (proprietary tool + Veo 3 + Kling AI). You can generate 3D objects to import back into SketchUp. You can enhance existing renders with Enhance Render.
It's more than any plugin offers. And easier to use.
Why "not being a plugin" is an advantage
It may seem counterintuitive. If Redraw were a SketchUp plugin, you could click directly from the software. But in practice, plugins create problems:
They depend on the SketchUp version. Update SketchUp and the plugin stops working until an update is released.
They weigh on the model. Render plugins add processing that makes SketchUp slower.
They limit use to one software. If tomorrow you model something in Revit or ArchiCAD, the SketchUp plugin is useless.
Redraw works with any software, on any machine, anywhere. Took a screenshot? Render it. Doesn't matter if it came from SketchUp Free on a Chromebook or SketchUp Pro on a workstation.
The complete SketchUp architect toolkit for 2026
| Function | Tool | Type | Cost |
|---|---|---|---|
| Organic shapes | Curviloft | Free plugin | Free |
| Subdivision | SubD | Paid plugin | ~$39 |
| Custom profiles | Profile Builder | Paid plugin | ~$49 |
| Scatter (vegetation) | Skatter 2 | Paid plugin | ~$69 |
| Model cleanup | CleanUp³ | Free plugin | Free |
| Solid verification | Solid Inspector² | Free plugin | Free |
| Urban context | PlaceMaker | Paid plugin | ~$100/year |
| Sections with hatching | Skalp | Paid plugin | ~$59 |
| AI render + video + 3D | Redraw | Web platform | $15/month |
Frequently asked questions
What is the best AI plugin for SketchUp?
Redraw is not a plugin but delivers superior results: photorealistic render in 30 seconds, nothing to install, with proprietary models trained for architecture.
Does Redraw work with SketchUp Free?
Yes. Since Redraw works with a screenshot of the model, it works with any version of SketchUp, including Free, Go, and Pro. No plugin or specific version required.
Which SketchUp plugins are free?
Curviloft, CleanUp³, and Solid Inspector² are free and essential.
Does Redraw generate 3D objects for SketchUp?
Yes. Redraw has a proprietary 3D object generation model that can be imported directly into SketchUp. Furniture, vegetation, lighting fixtures — any element missing from your library.
Is it worth paying for SketchUp plugins?
It depends on your workflow. SubD, Skatter, and PlaceMaker pay off the investment within a few weeks of use. For rendering, there's no point investing in a paid plugin when Redraw delivers more for $15/month with no installation.
Try Redraw → redraw.pro
Redraw Trends
Featured articles
AI for SketchUp: 10 Plugins and Tools Every Architect Needs in 2026


SketchUp is the most popular modeling software among architects in Brazil and worldwide. Easy to learn, fast to use, and with a plugin ecosystem that lets you do practically anything. But SketchUp alone has limitations. It's through plugins and external tools that it transforms from a "massing software" into a complete professional tool.
In 2026, AI entered this ecosystem with force. And the best part: the most powerful AI tool for SketchUp is not a plugin. It's easier than one. But before we get there, let's cover the essential plugins every architect should know.
Modeling plugins: SketchUp at its best
These plugins solve native SketchUp limitations and give you more control over modeling.
1. Curviloft
SketchUp struggles with organic shapes. Complex curves, flowing roofs, facades with non-linear geometry. Curviloft solves this. It creates surfaces from curves, smooth transitions between different profiles, and shapes that native SketchUp simply cannot produce. For architects designing contemporary buildings with curves, it's indispensable.
Free.
2. SubD (Subdivision Surfaces)
SubD adds subdivision modeling to SketchUp. You create a simple shape (low-poly) and the plugin smooths it in real time, generating complex organic surfaces. The trick is that you work on the simple model (fast and lightweight) and switch to the smoothed version when you need to see the result. Keeps the file light while allowing advanced geometries.
Paid (~$39).
3. Profile Builder
Creates custom profiles (baseboards, moldings, channels, metal profiles) and applies them along any path. Instead of manually modeling each detail, you define the profile once and the plugin extrudes it wherever you need. Saves hours in detailing work.
Paid (~$49).
4. Skatter 2
The most powerful scatter plugin for SketchUp. Vegetation, street furniture, stones, tiles — any object that needs to be repeated at scale. Skatter distributes objects across surfaces with control over density, random rotation, and region exclusion. It turns landscaping and urban scenes that would take hours into minutes.
Paid (~$69).
5. CleanUp³
Models imported from DWG, Revit, or other software arrive in SketchUp full of unnecessary geometry. Duplicate faces, stray edges, repeated materials. CleanUp clears everything automatically. Reduces file size, improves performance, and prevents problems at render time.
Free.
6. Solid Inspector²
Before exporting for 3D printing or any boolean operation, the model needs to be solid. Solid Inspector checks and automatically fixes geometry issues: reversed faces, internal edges, holes. It's the "doctor" for your model.
Free.
7. PlaceMaker
Draw a rectangle on the map and PlaceMaker imports 3D terrain, surrounding buildings, satellite imagery, and elevation data. It does in 2 minutes what would take a full day of manually modeling urban context. For site studies and shadow analysis, it's transformative.
Paid (~$100/year).
8. Skalp
Generates sections and elevations with hatching directly in SketchUp. For those who need technical drawings without leaving the software, Skalp creates sections with material patterns (concrete, earth, insulation) that update automatically when the model changes.
Paid (~$59).
AI plugins for SketchUp: what exists (and what's missing)
9. Redraw: the AI tool that isn't a plugin (and is better than one)
Redraw is not a SketchUp plugin. Nothing needs to be installed. And that's exactly why it works better.
The workflow is simple: take a screenshot of the 3D view in SketchUp, open Redraw in your browser, upload the image, and in 20 to 40 seconds receive a photorealistic render. Works with any version of SketchUp (Free, Go, Pro). No plugin compatibility required. No file weight added. No crashes.
AI plugins like SketchUp AI Render and Veras need to read the 3D geometry of the model, which creates version dependency, compatibility problems, and technical limitations. Redraw skips all of that. It works with the visual image of the model — which is what the AI actually needs.
And the result is superior. Redraw has proprietary models trained for architecture that understand materiality, natural lighting, and proportion. It's not generic AI with an architecture skin. These are models that know the difference between porcelain tile flooring and a wood deck, between sunset light and artificial lighting.
Inside Redraw, beyond the proprietary model, you access ChatGPT optimized for rendering, optimized Gemini, Nano Banana. You can generate project video (proprietary tool + Veo 3 + Kling AI). You can generate 3D objects to import back into SketchUp. You can enhance existing renders with Enhance Render.
It's more than any plugin offers. And easier to use.
Why "not being a plugin" is an advantage
It may seem counterintuitive. If Redraw were a SketchUp plugin, you could click directly from the software. But in practice, plugins create problems:
They depend on the SketchUp version. Update SketchUp and the plugin stops working until an update is released.
They weigh on the model. Render plugins add processing that makes SketchUp slower.
They limit use to one software. If tomorrow you model something in Revit or ArchiCAD, the SketchUp plugin is useless.
Redraw works with any software, on any machine, anywhere. Took a screenshot? Render it. Doesn't matter if it came from SketchUp Free on a Chromebook or SketchUp Pro on a workstation.
The complete SketchUp architect toolkit for 2026
| Function | Tool | Type | Cost |
|---|---|---|---|
| Organic shapes | Curviloft | Free plugin | Free |
| Subdivision | SubD | Paid plugin | ~$39 |
| Custom profiles | Profile Builder | Paid plugin | ~$49 |
| Scatter (vegetation) | Skatter 2 | Paid plugin | ~$69 |
| Model cleanup | CleanUp³ | Free plugin | Free |
| Solid verification | Solid Inspector² | Free plugin | Free |
| Urban context | PlaceMaker | Paid plugin | ~$100/year |
| Sections with hatching | Skalp | Paid plugin | ~$59 |
| AI render + video + 3D | Redraw | Web platform | $15/month |
Frequently asked questions
What is the best AI plugin for SketchUp?
Redraw is not a plugin but delivers superior results: photorealistic render in 30 seconds, nothing to install, with proprietary models trained for architecture.
Does Redraw work with SketchUp Free?
Yes. Since Redraw works with a screenshot of the model, it works with any version of SketchUp, including Free, Go, and Pro. No plugin or specific version required.
Which SketchUp plugins are free?
Curviloft, CleanUp³, and Solid Inspector² are free and essential.
Does Redraw generate 3D objects for SketchUp?
Yes. Redraw has a proprietary 3D object generation model that can be imported directly into SketchUp. Furniture, vegetation, lighting fixtures — any element missing from your library.
Is it worth paying for SketchUp plugins?
It depends on your workflow. SubD, Skatter, and PlaceMaker pay off the investment within a few weeks of use. For rendering, there's no point investing in a paid plugin when Redraw delivers more for $15/month with no installation.
Try Redraw → redraw.pro
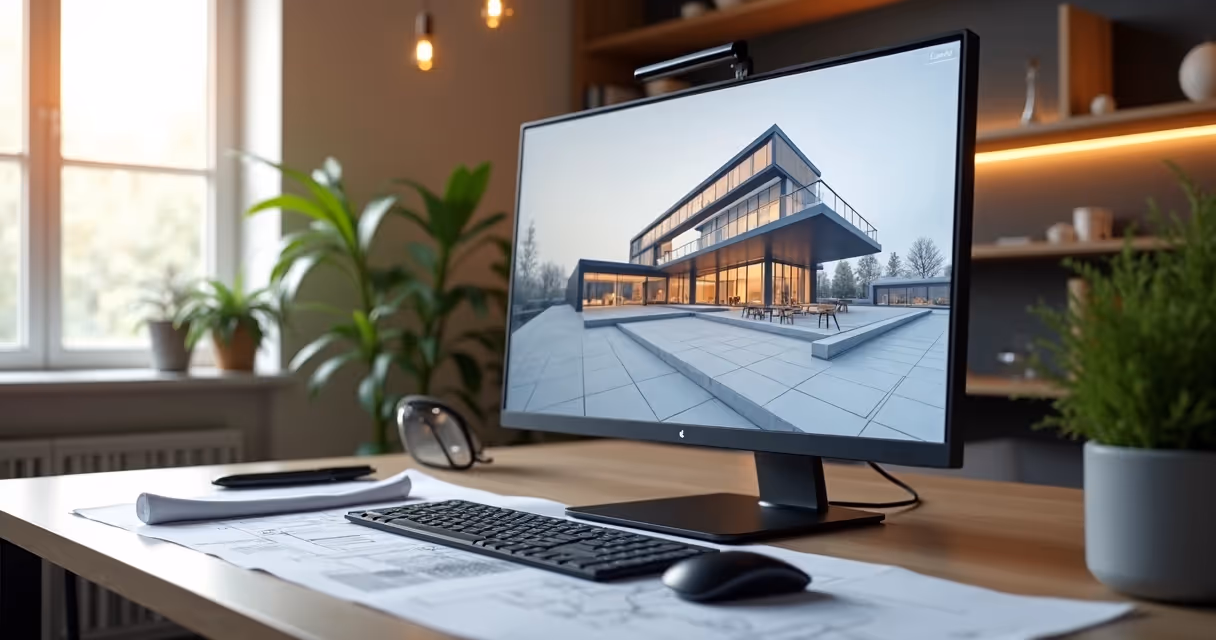
AI for Revit: How to Render BIM Projects with Artificial Intelligence in 2026
Revit is the most complete modeling software for architecture. That is not an opinion. It is the global BIM market standard. The amount of information a Revit model carries — precise geometry, assigned materials, construction data, dimensions, quantities — has no equivalent in any other software.
And it is precisely that richness of information that makes Revit excellent for AI rendering.
A well-built 3D model in Revit, when used as a base for AI, delivers superior results compared to SketchUp. The geometry is more precise, materials are already defined in the project, and views are generated with technical accuracy. The AI receives an image with more context, more detail, and consequently produces a better render.
The problem was never Revit. The problem is what comes after.
Revit's bottleneck: rendering

Revit models like nothing else. But rendering inside Revit is painful. The native engine is limited and slow. Most professionals turn to plugins (V-Ray for Revit, Enscape for Revit) or export to other software.
Each of these options adds cost, complexity, and time:
V-Ray for Revit costs $540/yr. It demands powerful hardware and hours of configuration per render. The result is excellent if you master it, but the learning curve is long and time is short.
Enscape for Revit costs $575/yr. It is faster to render but results look generic. Photorealism in materials and lighting is lacking.
Exporting to Lumion or D5 Render adds yet another step (and another license). The file must be exported, imported, reconfigured. Materials are lost in conversion. It is rework.
In the end, the professional who uses Revit spends more time trying to render than modeling. The software that produces the best 3D model on the market is the one that suffers most when it comes to generating images.
Revit + Redraw: the perfect model meets the perfect render
With Redraw, the workflow changes completely. You take a screenshot of the 3D view in Revit and upload it to Redraw. In 20 to 40 seconds, the AI generates a photorealistic render.
No plugin. No export. No material configuration. No waiting 2 hours for a render.
And the result is better than most renders produced with V-Ray or Enscape by professionals who do not have time to configure everything perfectly. Because Redraw's AI was trained to understand architectural context: it identifies materials by appearance, applies realistic natural lighting, and preserves the exact geometry of the model.
If the Revit model is well optimized (and we will cover how to optimize it shortly), the AI render surpasses what SketchUp delivers. Because Revit generates cleaner views, with more defined geometry, and the AI can interpret them with greater precision.
How to optimize your Revit model for AI rendering
Not every screenshot produces an excellent result. The model needs to be presentable. Some practical tips:
Use a realistic 3D view, not wireframe. The AI interprets what it sees. If the view has edge lines, axes, and annotations, the render will reflect that. Enable Realistic or Shaded mode in Revit before taking the screenshot.
Position the camera as you would in a real photo. Eye level (1.50 m to 1.70 m for interiors), natural angle, no excessive distortion. The AI delivers better results when the perspective feels human.
Keep materials assigned. Revit allows you to assign materials to each element. Even if they are not fully renderable materials, the visual information they provide in the 3D view helps the AI interpret what is floor, wall, glass, wood.
Clean up the view. Hide elements that are not part of the scene: piping, exposed structure (if not intentional), grid lines. The cleaner the screenshot, the better the result.
Use full-screen resolution. Take the screenshot at the maximum monitor resolution. More pixels = more information for the AI.
With an optimized model, Revit delivers the best possible base for AI rendering. Better than SketchUp (more precise geometry), better than ArchiCAD (more configurable views), and much better than exports to other software that lose information along the way.
The complete workflow: Revit + Redraw at every project phase
Phase 1: Concept
The project is just beginning. Mass studies, massing, initial site placement. You have a basic Revit model and need to show the client how the project is progressing.
With Redraw, take a screenshot of the massing and generate a quick render. The client sees the project volume with realistic materiality and lighting. In 30 seconds. Without spending hours on a render that will change next week.
Want to explore styles? Use Redraw's idea generation. Brutalist, contemporary, tropical facade. Generate variations in seconds and align direction with the client before developing further.
Phase 2: Design Development
The model is advanced. Materials defined, spaces detailed, lighting considered. Now you need quality renders to validate with the client and make final adjustments.
Screenshot of the Revit 3D view, upload to Redraw, render in 30 seconds. The client asks for wood flooring instead of porcelain tile? Another 30 seconds. Prefers black frames instead of white? Another 30 seconds. In 10 minutes you have generated 15 variations that in the traditional workflow would take 2 days.
Phase 3: Client Presentation
Project approved — time to present with final quality. Facade renders, interiors, aerial perspectives. Material for the commercial proposal, portfolio, and social media.
Render in Redraw at maximum quality. Use Enhance Render to refine details. Generate a project video with Redraw's video tool (proprietary model, Veo 3, or Kling AI). Generate 3D objects missing from the model and import them into SketchUp/Revit.
Complete deliverable. One platform. One subscription.
Frequently Asked Questions
Do I need a plugin to use AI with Revit?
No. Redraw works through the browser. You take a screenshot of the Revit 3D view and upload it to the platform. No plugin to install, no file to export, no integration required.
Is a Revit model good for AI rendering?
Excellent. Revit generates precise geometry with assigned materials. When well optimized, a Revit screenshot delivers superior results to SketchUp for Revit AI rendering, because the AI receives more context and more detail.
Does Redraw replace V-Ray for Revit?
For the vast majority of everyday renders (presentations, variations, portfolio), yes. V-Ray retains an advantage only in scenarios requiring absolute control of every parameter. For everything else, Redraw is faster, cheaper, and the result is professional.
Can I render Revit sections and floor plans with AI?
Yes. Redraw accepts any image. If you generate a humanized section view or floor plan in Revit and upload it to Redraw, the AI can humanize and stylize it. Redraw has presets for humanized floor plans and architectural sections.
Does Revit run on Mac?
Not natively. Revit is Windows only. But BIM rendering AI with Redraw works on any system. You can model on Windows with Revit and render on Mac, tablet, or mobile through Redraw.
Try Redraw → redraw.pro
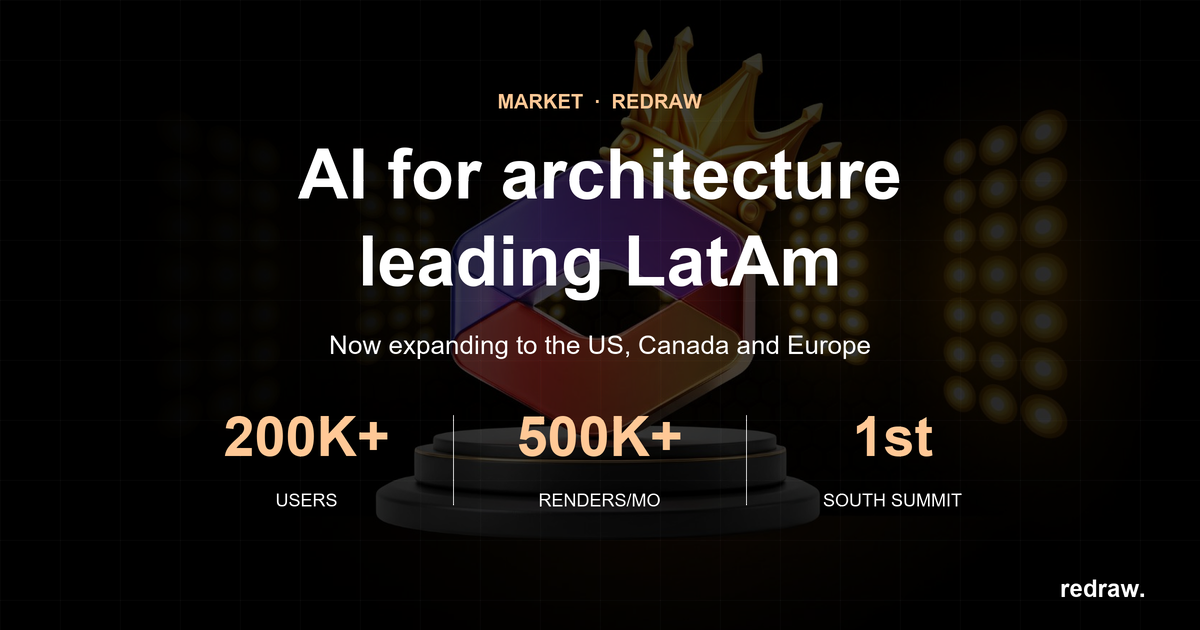
The AI for Architecture Leading Latin America Now Expanding to the US and Europe
Latin America is producing the world's largest AI rendering revolution. And Brazil is leading it.
While American and European companies try to adapt generic AIs to architecture, a Brazilian startup built from scratch the largest AI platform specialized in rendering for architects, engineers, and interior designers on the planet. With more than 200,000 registered users, over 500,000 renders generated per month, and a presence in dozens of countries.
The name is Redraw. If you work with architecture in Latin America — or anywhere in the world — and don't know it yet, this article explains why you should.
The numbers that position Redraw as the best AI rendering platform for architecture in Latin America
200,000 registered professionals. The majority are in Brazil, with accelerating expansion to Mexico, Colombia, Argentina, Chile, Peru, and English-speaking markets (US, Canada, Europe).
More than 500,000 renders per month. That is more than any other AI platform focused on architecture in the world produces. And the volume grows every month.
Platform in 3 languages. Portuguese, English, and Spanish. Native websites, support, and content in each language. Not automatic translation. Local operation.
Team of AI specialists. Proprietary models trained exclusively for architecture, engineering, and interior design. Constantly updated. Results that, in benchmarks, surpass any generic AI in project fidelity.

South Summit 2026: global recognition
In March 2026, Redraw won South Summit in Porto Alegre in the Digital and Tech Solutions category. South Summit is one of the largest global platforms connecting startups, investors, and major corporations. The Brazilian edition had more than 23,000 participants, around 3,000 startups registered, and 130 investment funds.
More than 2,000 companies entered globally. Only 50 reached the final, split across 5 categories. Redraw took the prize.
This recognition is not just a trophy. It is validation that the problem Redraw solves — accessible, fast, and faithful rendering for project professionals — has global relevance. And that the solution came from Latin America.
Why no competitor dominates Latin America
Redraw's main global competitors are American, European, and Chinese companies: Veras (Chaos Group, based in Bulgaria/US), LookX (China), Rendair (Turkey), ArchiVinci (US). None of them have a strong presence in Portuguese or Spanish.
They have no PT-BR support. They do not understand the particularities of the Latin American market. They do not know that here, the professional often works alone, with a laptop, without a hardware budget, and needs to deliver fast because the client asked yesterday.
Redraw was born in that context. Built by people who understand the reality of Brazilian and Latin American architects. And that shows in everything: accessible price (from US$15/month), 100% cloud platform (works on any machine), support in Portuguese and Spanish, and educational content in all 3 languages.
While competitors charge US$30 to US$60/month for generic results, Redraw delivers more for less. Because it was built for this market.
The global expansion that starts from Brazil
Redraw started in Brazil and is expanding to the world: US, Canada, Europe, Middle East. International traction grows every month, driven by the quality of proprietary models and the recognition from South Summit 2026.
But the core remains Latin America. This is where the 200,000 professionals who validated the platform are. This is where daily feedback shapes every update. Redraw is not an American company trying to translate a product for Brazil. It is a Brazilian company taking the best AI for architecture to the world.
That matters. Because when a Latin American professional needs support, they speak with someone who understands the context. When they suggest a feature, it is considered. When they complain, they are heard. Not "ticket #47832 with a response in 72 hours in English."
Warning: beware of the generic AIs flooding the market
With the growth of the AI for architecture market, a serious problem has emerged: dozens of new tools that charge high prices for results that are not worth it.
What these tools do: they take the ChatGPT or Gemini API, put an interface on top, add an "AI for architecture" label, and charge $10 per 10 renders — $1 per image generated by an AI anyone can access directly through ChatGPT for free.
They have no proprietary model. They do not invest in architecture-specific training. They have no AI team. They are intermediaries reselling generic API with absurd markup.
The result is predictable: generic images that do not maintain project fidelity, without consistency, without control. The professional pays a lot, gets a bad result, and concludes that "AI for architecture doesn't work." It does work. It just doesn't work with an API reseller.
How to identify these tools:
Ask if the platform has proprietary models trained for architecture. If the answer is vague or they say they "use the best models on the market" without specifying which ones are theirs, it is API resale.
Look at the price per render. If they charge $1+ per image, that is exploitation. Redraw delivers 300 renders for US$15/month (less than $0.05 per render).
Test with your real project. If the AI changes geometry, invents windows, and alters proportions, the underlying model is generic. The packaging does not matter.
What Redraw delivers that generic platforms cannot
Proprietary models. Trained with millions of real images from architecture, engineering, and interior design projects. Not ChatGPT with a skin. Proprietary AI that understands architectural projects.
Optimized AI hub. ChatGPT, Gemini, and Nano Banana inside Redraw, all prepared by the team to deliver superior results for architecture. The ChatGPT inside Redraw is not the same ChatGPT you use on OpenAI's website.
Complete ecosystem. Photorealistic render in 30 seconds. Enhance Render. Video generation with a proprietary tool + Veo 3 + Kling AI. 3D object generation for SketchUp. Everything in one platform, for one subscription.
Fair price. From US$15/month with ~300 renders. Free trial with 10 credits, no credit card. No tricks, no credits that expire in 24 hours.
Real support. In Portuguese and Spanish. WhatsApp, email, live chat. People who understand architecture responding, not a generic bot.
Frequently asked questions
What is the best AI for architecture in Latin America?
Redraw is the largest AI platform for architecture in Latin America, with over 200,000 users and 500,000 monthly renders. It serves professionals in Brazil, Mexico, Argentina, Chile, Colombia, Peru, the US, and Europe. Winner of South Summit 2026 in the Digital and Tech Solutions category.
Is Redraw a Brazilian company?
Yes. Founded in Brazil, operating in Portuguese, English, and Spanish. The development, AI, and support team operates from Brazil, with international expansion. The company is headquartered in the United States.
Are generic AI tools for architecture a scam?
Not all, but many charge excessive prices ($1+ per render) to resell the ChatGPT or Gemini API without any proprietary training. Before subscribing, verify whether the platform has proprietary models trained specifically for architecture.
Does Redraw work in other countries in Latin America?
Yes. The platform is available in Portuguese, English, and Spanish, with an active presence in Mexico, the United States, Canada, Colombia, Argentina, Chile, Peru, and other countries. Support is available in all languages.
How much does Redraw cost?
From US$15/month with ~300 renders. Free trial with 10 credits, no credit card required. It is the AI architecture platform with the best value for money in Latin America — and increasingly competitive globally.
Try Redraw → redraw.pro
cadastre-se
Exclusive content directly in your email


How to Render in Enscape

Efficient Rendering: What to Expect from Enscape
How to render in Enscape is one of the most frequently asked questions among architects and designers who want quick, uncomplicated results. And look, I totally understand: who has time to wait hours for a rendering when the customer is breathing down their neck asking for urgent changes? Enscape arrived promising miracles in real time, but does it really deliver? That's what we're going to see together in this guide. And of course, if your patience is running out or your PC is almost on fire, know now: Redraw can save you with rendering via AI directly from the browser, without high-end hardware. But calm down, before trying everything out, come with me to understand the secrets, successes and pitfalls of Enscape.
What is Enscape and why you should use it (spoiler: maybe not)
Enscape is that plugin that seems like magic for SketchUp, Revit, Rhino and Archicad: you click and you can see your model in real time. It's good for impressing customers in front of the computer, yes. But if you want full control over lighting, materials, and post-processing, it can leave something to be desired. Another point: it needs decent hardware. Sometimes the rendering drops in quality or crashes, and then that regret hits. Is it useful? Without a doubt. Is it perfect? There's still a bit left.
Not every render comes out as a work of art just because you clicked “Start”.
Prerequisites: Setting up your setup for success
Before attempting your first render, make sure your computer can handle the lock. Enscape needs a decent graphics card, which can be a huge limiter for students or self-employed professionals. RAM also influences a lot. Don't make a thousand tabs open in the browser, okay? The key is to shoot only what is essential.
- Dedicated video card (at least 4GB VRAM recommended)
- Recent processor
- Few programs while rendering
Does it still lock? There is Redraw to escape suffocation without depending on hardware, it's worth remembering.
How to Render in Enscape: Step-by-Step Tutorial
- Open the model in SketchUp, Revit, or Rhino. Preferably, you already have your project complete or are almost ready.
- Start Enscape. Click “Start Enscape” and wait for it to load the view in real time. Shortcut? F5, your new friend.
- Explore the interface. Move around the project to see angles, test lights, and decide on the best framing.
- Press the capture button (camera icon) to generate the static rendering. Five minutes or less, depending on complexity.
First render: fast or almost. But will it be beautiful? That depends on the next few tips.
Configurations that make the difference
Settling for the standard definition is a beginner's thing, okay? Tweak the visual settings: adjust brightness, contrast, exposure, and color temperature. Be careful not to overdo it with Bloom or in the saturation. The output resolution also plays a role in the result: for a portfolio, forget 800x600. Use high resolutions (4K if you can), and enable Safe Frame to ensure good framing.
- Balance performance and quality if the PC doesn't help
- Save presets for common scenes
It sounds basic, but few people make fine adjustments and everything changes with 5 more minutes of attention.
Mastering lighting in Enscape
Natural light is generated by Enscape's automatic sun and sky, but controls the time of day as needed. For artificial light, include spots, omnilights, and lines by model. Try changing the solar angle. Another golden tip? Use HDRI images in the sky; this gives realism to the reflections and tones of the scene.
- Don't overdo the amount of artificial lights
- Sometimes less is more: 1 well-placed light is worth 10 poorly placed
Materials and textures: from basics to photorealism
Enscape's material library is reputable, but go further: use the advanced editor to tinker with bump, reflectivity, and roughness maps. 2K textures are fine for small projects, but for close scenes, 4K works miracles. Just don't abuse it so as not to weigh the file too much, okay?
- Play with reflection maps and normal map
- Beware of exaggerated reflections, they become artificial!
Asset Library: Your Best Friend (and Worst Enemy)
Enscape offers more than 1,900 ready-made assets: trees, people, furniture. Use wisely to bring scale and life to the project, but don't clutter up the scene. Abuse proxies to keep loading light. Organize favorites so you don't waste time hunting for items every time.
An extra couch can weigh... a lot.
Batch rendering: automating your workflow
Do you need to generate multiple images at once? Set up saved views, choose visual pattern for each one, and use the batch export function. Does it save time? Of course. Just don't forget to check out each scene beforehand - sometimes the lighting or material fails in one of them.
- Create different presets for day and night
- Review each image, mistakes happen!
Advanced techniques that few know
For small projects, reduce the field of view to avoid distortion. Use cuts and sections to highlight interiors, 360° panoramas to sell the space concept, and if you want to impress your portfolio, play with virtual reality. Not many people explore these resources, which is a shame.
Animations in Enscape: professional walkthroughs
The built-in video editor allows you to create camera routes, adjust transitions, angles, and even post-processing effects. Remember to work on the timing: passages that are too fast don't work. Test different viewpoints, and don't hesitate to redo it until you get it right.
- Short, objective sequences work best
Solving common problems (troubleshooting)
Is Render slow or crashing? Close open programs, lower resolution, or simplify heavy materials. Flashing lights or total darkness almost always indicate misplaced lights or lack of ambient lighting. If any material doesn't appear, review the model's UV mapping or try to redefine it by the material editor.
- Update video card drivers to avoid bugs
- Start the tests in small scenes before moving on to the entire project
Enscape vs AI: The Future Has Arrived Earlier
Enscape delivers what it promises, to a certain extent. But the future lies in solutions like Redraw: AI that generates renderings with surprising quality without that absurd hardware requirement. With AI, you don't need more hours or expensive video cards. Everything happens in the cloud, right from the browser, and creative freedom is much greater.
Time is money. And your time shouldn't be spent waiting for render bar progress.
Compare for yourself: convenience, speed, and limitless quality. After experimenting with the Redraw flow, going back to the Enscape tutorial feels... kind of old. Here's a tip for those who want to modernize their workflow and invest in their creativity.
FAQ: frequently asked questions about rendering in Enscape
How do I start rendering in Enscape?
Open your model in SketchUp, Revit, Rhino, or Archicad, click “Start Enscape” and adjust the navigation until you find the best frame. Then, use the capture button to save your rendered image. The process is quick and intuitive, even for those who are just starting out.
What are the best Enscape settings?
Prefer high resolutions for final images, adjust brightness, exposure, and contrast manually. Use safe frame to compose the scene well and, whenever possible, save visual profiles for recurring projects. The key is to balance performance and quality, adjusting according to the power of your computer.
How to make renders more realistic?
Invest time calibrating lighting, combining natural and artificial light, and abuse HDRIs in the sky. Use good-resolution textures and refine materials using bump and reflectivity maps. In scenes, position assets in a natural way and adjust the perspective so as not to distort spaces.
What modeling programs does Enscape work on?
Enscape integrates with SketchUp, Revit, Rhino, and Archicad. Just install the plugin and it appears directly on the interface of these programs, facilitating the flow between modeling and rendering without leaving the main software.
Is rendering in Enscape fast?
Yes, as long as you have a computer with a dedicated graphics card. The real-time preview is almost instantaneous for lightweight models, but large or very detailed scenes require more processing, in this case, solutions like Redraw overcome limitations, delivering speed without depending on your hardware.
Conclusion: Your Next Step in Rendering
We've come to the end of this tour of the secrets of how to render in Enscape. If you were excited or perhaps a little frustrated by the technical limitations, know that the universe of architectural visualization is changing. With AI, as offered by Redraw, you gain time, freedom, and high-level results right from the browser. Take the opportunity to try the new way of rendering. Modernize your flow and leave Enscape in the past if you want real agility. Come and meet Redraw: your next rendering may be simpler (and more beautiful) than you imagine.

Real Estate Marketing
The New Real Estate Marketing Scenario
Real estate marketing isn't just about placing a “For Sale” sign on the front of a plot of land and cheering for someone to show up. If that were the case, everyone would be a millionaire selling houses, wouldn't they? The truth is that the real estate market has changed dramatically, and those who still think that a colorful pamphlet will solve all problems are living in the era of digital caves. Now, digital strategies make perfect sense, especially for architects, engineers, interior designers, and companies that want to sell projects, win clients, and stand out. And yes, Redraw is here to transform your visual marketing with real artificial intelligence, no three-day renders! If you want to know how to prepare your business for 2025, read on and discover the twelve strategies that will redefine your online positioning. And of course, then try Redraw to take your images (and sales) to the next level!
What is real estate marketing and why you need to master
Have you ever tried to explain to a client what that integrated room filled with natural light would be like, but noticed that they shook their heads like someone who says “I understand” and, in the background, did not see anything? So, you've already felt the importance of good marketing in the real estate sector. It's not enough just to know how to plan architectural projects: you need to know how to sell them. This means creating clear, visual, and objective communication, in addition to using digital resources to reach the right audience. In the end, real estate marketing involves everything, from the first contact to the closing of contracts.
In fact, mastering these strategies is a matter of survival for architects and designers who don't want to be left behind. After all, consumers in 2025 already take a virtual tour before they even leave home. And hastily rendered a project or low-quality images are becoming less and less tolerable. This is where Redraw makes all the difference, but let's get there...
Those who don't show up simply don't exist.
How real estate marketing revolutionized with artificial intelligence
If there is an important frontier for the sector, it is called artificial intelligence. Remember those renders that took hours, sometimes days, and crashed computers? Well, now they're ready in seconds, right in the browser and with jaw-dropping quality. This evolution reduced the time spent on repetitive tasks and allowed professionals to dedicate more energy to creating, personalizing communication, and customer service.
Process automation, such as instant generation of realistic images and animated videos, is already a reality. AI-based tools, such as Redraw, are rewriting the rules and making marketing for real estate agents much more visual and effective. This is because clients' decision-making is much faster and more assertive when they see the project exactly as it will be.
It sounds like magic, but it's technology. Get ready, because everything that seemed complicated and time-consuming will become a thing of the past, along with the old sales sign.
7 real estate marketing strategies that every architect should know
Do you want to make a difference in marketing in the real estate sector? I separated the seven digital strategies that cannot be missing in your planning. Remember that creativity and visual quality must always go hand in hand. Let's check:
SEO for architecture portfolio
Do you know the incredible portfolio that you spent hours fine-tuning in SketchUp, Revit, or AutoCAD? Well, if it's not optimized for searches, maybe no one (other than your mother) will find it. SEO is the rice bean of digital real estate marketing: working on keywords such as “sustainable projects”, “house with pool” or “small apartment renovation” in titles, descriptions and images is essential.
- Always include detailed project descriptions
- Add tags to images (and always use good images, okay?)
- Create frequent content, such as articles about trends and tips
In fact, realistic renders and animated videos made on platforms like Redraw increase not only the time visitors spend on your site, but also the chances of them becoming a lead.
Visual social networks (Instagram, Pinterest)
If you think that just posting a photo of the finished project will do the trick, think again. Social networks, especially visual ones, are powerful storefronts. But here's the trick: it's not enough just quantity, it's quality and context that make the difference. Invest time and energy in:
- Carousels showing the before/after
- Short videos of virtual tours
- Backstage stories from the creative process
- Posts explaining technical concepts in a simple way
Instagram, for example, values short videos and impressive images. If you render your projects with high quality on Redraw, you can be sure that you will attract attention (and maybe even tear off that “Wow!” two followers).

Email marketing with projects
Yes, good old email still works miracles, if it's used well. The trick is to personalize, there's no use sending the same message to everyone. And never, ever send a bunch of heavy attachments: prefer links to online renders, short videos, and optimized images. Practical tips:
- Segmentation of lists by type of customer (residential, corporate, etc.)
- Emails with portfolio news or exclusive release
- Short, visual presentation with clear CTA
Customers want to see solutions, not spam. Take the opportunity to show how fast rendering with AI streamlines your process and delivers more value.
Technical content marketing
Nobody can stand those texts full of blah-blah-blah that don't explain anything. Producing technical but accessible content is still rare in marketing for real estate agencies and architectural firms. And that can be your differential. Suggestions:
- Material guides most used by architects and engineers
- Frequently asked questions about renovations and works explained visually
- Quick videos showing innovative solutions
In addition, including images comparing technical solutions with realistic renders helps in understanding the client. Do this and see how much more engaged your leads are!
Strategic Partnerships
Those who work in isolation are, in practice, digitally invisible. Partnerships, whether with construction companies, real estate companies, furniture suppliers or technology companies, expand the reach and give clients more confidence. Examples of action:
- Videos together showing an end-to-end project
- Lives with partners answering questions from followers
- Integrated promotional actions (“refer a friend and win...”)
When everyone wins, your projects travel faster and with more authority.
Virtual tours with AI
Have you ever tried to present a real estate project with only floor plans and models? It sounds like a boring geometry class. Now, virtual tours with the support of artificial intelligence allow the client to “walk” around the property, change colors, furniture, styles and even simulate lighting. The best part: it can be done right from the browser, without all that drama of downloading large files. If rendering was already boring and complicated, Redraw does it in seconds, making the process quick and didactic, even for those who don't understand anything about architecture.
B2B Influencer Marketing
Do you know that digital influencer who talks to construction companies, other architects, designers or suppliers? In digital strategies for 2025, the B2B (business to business) focus is gaining strength. Showing results, sharing success stories, and participating in online events in the area generates qualified visibility. And honestly, nothing better than another professional recommending your work. If it shows your incredible realistic images and renders, even better!
In the project market, reputation sells more than pamphlets.
Digital marketing vs traditional marketing in the real estate sector
Have you ever wondered if it's worth investing more in digital stocks than in classic ones, like that good old banner on the façade? The answer lies in the data: almost 95% of property searches start online. The client wants to research prices, compare projects and view environments before even visiting the place.
- Digital marketing allows audience segmentation, result tracking, and personalization
- Traditional marketing (flyers, billboards, newspaper advertisements) has a much more limited reach
- Combining the two ways may still work, but the highlight is the integration with technology
In other words, it's not the end of the brochures, but each real invested in digital strategies offers much more return and data to adjust campaigns, refine the discourse and hit (almost) the fly.
How to measure results in real estate marketing: essential KPIs
If you don't like numbers, it might be time to rethink your strategy. Measuring results is what separates professionals from amateurs in digital real estate marketing. KPIs (key performance indicators) don't have to be scary, but ignoring them is asking to throw money away. Here are some of the key KPIs to keep an eye on:
- Conversion rate: how many visitors saw leads, and how many leads became customers
- Cost per lead: how much does it cost to conquer each potential customer
- Open rate and clicks in email marketing: are the emails being read? Do CTAs work?
- Time spent on site/portfolio pages
- Social media engagement: likes, shares, comments
- Origin of contacts: where your leads are coming from (Google, Instagram, partnerships, etc.)
The more detailed the follow-up, the better the adjustment of your campaigns. It's boring at first, but once you get the hang of it, you start to like the numbers going up, I promise.
Real estate marketing trends for 2025
If you want to ride the next wave, you need to know where it's going to break, right? Then, here are the strong trends in digital strategies for the real estate market in 2025:
- Personalization by AI: campaigns and content tailored to each customer profile
- Hyper-realistic renders and animations: the more real, the higher the conversion rate
- 100% digital tours and visits: The client knows the project without leaving the couch
- Heavy use of short videos: Public attention is dwindling
- Integration with automation platforms: less manual labor, more time to think about new projects
- User-generated content: testimonials, critiques, and reviews from customers or partners
- Instant service: chatbots and automated messages are already required
Technology, especially platforms such as Redraw, is already part of this scenario, allowing the delivery of high-quality material in record time and at an affordable cost.
Fatal Real Estate Marketing Mistakes (and How to Avoid Them)
Yes, everyone has slipped into any of these, maybe even you:
- Ignore or underestimate digital presence
- Investing in low-quality images, poor rendering drives away, doesn't attract
- Send multiple generic and cold messages
- Don't measure results or analyze data
- Promise more than you can deliver
- Think only about the price and forget about the price: design is part of the sale
Its audience is increasingly informed and impatient. If you get the basics wrong, don't expect a second chance. The secret? Dedication, time and, of course, state-of-the-art technology to deliver what the customer expects (or even more).
Tools for real estate marketing
The good news is that you don't have to do everything yourself, using pencils, paper, and hope. There are several platforms that automate tasks, improve your communication, organize contacts and, most importantly, get your renders ready quickly. Redraw, for example, is perfect for those who use SketchUp, Promob or Revit and want to gain agility without sacrificing visual quality.
- AI-powered online rendering platforms
- Email marketing software with automation
- Customer Management Systems (CRM)
- Tools for intuitive graphic design
- Apps for scheduling and controlling social networks
- Data analysis solutions, from Google Analytics to customized dashboards
The secret lies in choosing those that really bring back. Sometimes less is more. And if each tool integrates well with your workflow, the result appears painlessly.

FAQ: frequently asked questions about real estate marketing
How to do digital real estate marketing?
Digital real estate marketing is about building an online presence with a focus on conquering and delighting clients. This includes optimizing portfolio with SEO, investing in realistic images, using social networks to showcase projects (not just to “make it beautiful”), and creating useful content, such as tips, videos, and tutorials. Paid ads help, but if you don't present visually stunning projects, you could end up wasting investment.
What is the importance of marketing in the real estate market?
Without well-defined strategies, no project reaches its ideal audience. Marketing transforms architects, engineers, and designers into references for those who are truly willing to hire. It brings customers closer together, streamlines decisions and, in the end, makes the phone ring. For complex projects, with a lot of details, good visual communication (and the use of AI such as Redraw) can be the difference between closing a contract or not.
What are the best real estate marketing strategies?
Among the best strategies are: portfolios optimized for search, technical content marketing, intelligent use of visual social networks, strategic partnerships, virtual tours with AI support, segmented email, and B2B influence. And of course, constantly invest in high-quality images, whether for a simple Instagram or for the presentation that closes the contract. Mixing it all in an authentic way usually brings great results.
How to create content for real estate marketing?
Start by understanding your audience's questions and wishes. Show the project step by step, explain creative decisions, share challenges and solutions with high-definition images. Guides, explanatory videos, case studies, and backstage work great. Realistic renders made with AI make communication even more visual and easy to understand, attracting curious people (and future customers!) closer to your work.
How to use social networks in real estate marketing?
Social networks work like an active showcase: post project photos, short videos showing the process, before and after carousels, stories with everyday curiosities, and answer questions in the comments. Focus on visual quality and take advantage of features such as polls, lives, and targeted ads. Those who interact on the networks will first remember their name when doing a project.
How much does it cost to do real estate marketing?
The investment varies depending on the size of the office, level of automation, and focus of the campaigns. You can start by investing only time, with quality organic content. But to grow fast, paid ads, professional renders, and routine automation end up being inevitable and worth every penny. Platforms like Redraw offer affordable plans, democratizing access to cutting-edge technology.
How to measure results in real estate marketing?
Track indicators such as conversion rate (visitors who saw customers), engagement on social networks, email marketing open rate, time spent on the portfolio, and the origin of the leads. There are free and paid platforms to unify this information, making it possible to adjust the strategy almost in real time, and avoid wasted investments or misdirected efforts.
What is the role of SEO in real estate marketing?
SEO is the “invisible showcase” that makes your portfolio and projects appear on Google when someone searches for keywords from your universe. Optimizing titles, descriptions, images, and texts with terms searched by clients (such as “residential project 2025”, for example) increases reach and brings more qualified leads. Ignoring SEO, today, is like setting up the dream store in the top basement of a mall without direction signs.
Conclusion: Your Next Step in Real Estate Marketing
Now it's clear: modern real estate marketing is not a recipe for cake, but rather a set of strategic actions that connect architecture, design, technology and, above all, results. The key lies in uniting creativity, automation, data, and impactful images. If you were waiting for a signal to evolve or revolutionize your digital presence, that signal is now.
Don't just sell projects, create unforgettable experiences.
Do you want to transform your images, accelerate the closing of proposals and mark your name among the best professionals in the sector? Try Redraw and see how AI can take your visual marketing to the next level. Because, let's face it, those who still rely on old renders and dull presentations run the real risk of being forgotten before 2025 even ends.
How to Render in Revit
How to render in Revit: from basic to professional in 2025
How to render in Revit may seem like a task for those who like strong emotions: that progress bar that walks at a turtle's pace, the rendering that comes out almost black, the fright when looking at the video card at work. If you've ever wasted hours (or days) waiting for a result that didn't impress anyone, you've come to the right place. You'll understand how to supercharge your rendering in Revit, using little-known shortcuts and features, and even add a touch of artificial intelligence to save time, with tips for workflows that include platforms like Redraw.
That near-perfect rendering may be just five minutes away.
Imagine getting realistic and presentable images without needing a NASA computer or all the wasted mornings. And for those who live on tight deadlines or need to show last-minute ideas, the secret lies not only in mastering Revit, but in using the right tools, in the right order, with the touch of creativity that only those in the area understand.
Why your renders in Revit are taking so long (and how to fix it)
Before moving on to the techniques, let's face the truth: many renders done in Revit take a long time. Sometimes it's the hardware's fault, but in 85% of cases, it's improper configuration, accumulation of unnecessary information, and wrong choices in the process.
- Very heavy models (a lot of detailed geometry where you don't need it)
- Materials without texture or reflection parameterization
- Artificial lighting activated without adjustment
- Absurd resolution rendering for simple tests
Have you ever done a quick test and left Revit rendering in “Final Quality” mode, only to discover after 40 minutes that a backup light was missing? Well, everyone has fallen for it. The path to avoiding this drama begins with changing the mentality: taking tests on draft and focus on adjusting light, materials, and cameras first, before investing time (and patience) in a definitive image.
Step by step: how to render in Revit in 5 minutes
Now that you understand the bottlenecks, let's go straight to the flow that separates those who still suffer from those who deliver quickly.
Step 1: Creating the Perfect Camera
Open the 3D view, but don't use the pattern. Create a Camera appropriate to the framework. The secret of beautiful rendering begins with the “look”. Rotate, adjust the field of view (avoid very wide angles), and lower the camera height to something close to the human experience (between 1.20m and 1.80m is usually ideal). Oh, avoid placing the camera attached to the wall, it makes everything weird.
Step 2: the magic kettle (RR shortcut)
If you always go through the rendering menu, you're wasting time. The shortcut RR Open the render window directly. Try it, your finger will thank you. Just remember to be in the right view.
Step 3: settings that make a difference
When you open the render window, don't be tempted to choose “High” or “Best” right off the bat, especially for tests. Adjustment:
- Quality for “Draft”
- Reduced resolution (1/3 of the final size)
- “Solar” lighting only if there is no artificial light
- Check solar time, which can completely transform your image
Once you've found the correct frame, adjust the lights and continue to sharpen after that.
Quality settings: draft vs high vs custom
Everyone knows that the higher the quality, the more your computer sucks. But is it always worth the wait?
When to use each quality mode
- Draft: To study light, shadow, materials, and camera angle. Render in less than 30 seconds (on medium PCs).
- High: Only in the already approved yield, after everything has been done. It can take anywhere from 10 minutes to a few hours.
- Personalized: For those who like to venture out. Adjust reflection, smoothing, and grain parameters manually as the scene asks.
The secret of rendering levels
The secret of professional renders lies in the shade details and the number of samples. The difference between “Draft” and “High” is striking in the softness of light, but for an inexperienced customer, maybe “Medium” will do the trick. A tip: make side-by-side comparisons.
Many top renders don't go above the Medium level. It's the look that makes the difference.
DPI: the difference between screen and print
Do you want to render for on-screen presentation? Use 72 to 150 DPI. For printing in A3 or larger, go up to 300 DPI. But be careful: increasing DPI without increasing frame resolution changes little in practice - it doesn't fall into this trap.
Lighting in Revit: The Most Important Factor
Do you know that rendering that looks like an old video game? 90% of the time it's the fault of the misconfigured light.
Sun only vs Sun and artificial
Revit offers rendering with sunlight only or combined with artificial lights. Use “Sun only” for outdoor areas, “Sun and artificial” for interiors (when you have large windows), and “Artificial only” for indoor night scenes. Test each setting and see how the atmosphere changes.
Setting up artificial lights correctly
When using artificial lights, avoid the pattern. Adjust intensity, color, and distance from the lighting spot. Make a test render with each light activated separately, so it's clear which one affects which area. If the scene is bursting, some light is probably too bright or duplicated.
Time of the Sun makes all the difference
Change the noon standard time to 7:00 or 17:00 and watch the magic happen; the shadows get longer, the colors warmer, and the image much more interesting.
Materials and textures: how not to leave everything gray
Rendering in Revit without adjusting materials almost always results in images that appear to have come out of a printer without color ink. Fortunately, this is easy to avoid.
Adjusting native Revit materials
Revit includes basic materials, but for true presentation, change the parameters of each one: brightness, reflection, color, texture. Change the standard floor to the one of your actual specification, or adjust the glass to reflect what's outside.
Importing quality textures
Upload high-resolution textures. The secret lies in escaping the infamous “repeating square”. Use large patches, at least 2,000px, for floors, walls, or metals. Adjust texture scale in the material editor, testing with draft rendering.
PBR in Revit: Is it worth it?
Revit supports PBR (Physically Based Rendering) maps. Using normal, relief, and specular maps makes the rendering much more realistic. It takes a little more work, but for special projects it pays off. For everyday projects, a simple adjustment to brightness and color will do the trick.
Cloud vs local rendering: full analysis
Waiting for the PC to fry while rendering is no longer mandatory. Revit allows you to render locally or in the cloud. But is it always worth using the cloud?
When is it worth using the cloud
When the deadline is tight or the hardware doesn't help, rendering in the cloud is an almost saving way out. For high-resolution images, animations, or when other people need a computer, it's simply a logical choice.
Time and quality comparison
- Local: For fast draft renders, results in seconds or minutes, depending on the hardware.
- Cloud: Similar delivery times, but free up your machine while processing.
- In terms of quality, the cloud usually delivers images with post-processing and less noise.
Hidden costs of local rendering
Local rendering wastes energy, overwhelms the PC, and sometimes crashes everything at the most critical moment. I already lost a job because of a Windows update just before it was finalized...
“In the cloud, if it's bad, your coffee is still hot.”
Platforms like Redraw offer cloud rendering assisted by artificial intelligence, which transforms sketches and static images into realistic results quickly, right from the browser - that peace of mind for those who live on multiple projects.
Exposure adjustment: saving “lost” renders
Have you ever rendered that wonderful scene and... everything turned gray, or burst? Calm down that the exposure adjustment saves almost everything.
Exposure value: the master control
- Increase exposure if the image is dark.
- Reduce if the rendering was left with bursting areas and no detail.
Golden tip: make minor adjustments and render previews. The best value depends on the scene.
Highlights and shadows: finding balance
Use the controls of Highlights and shadows to adjust contrast. Too much shade makes the rendering depressing, highlighting too much “erases” the details. Seek balance, simulating the natural human gaze.
Saturation and white dot: the icing on the cake
Adjust the saturation to bring colors to life, without getting to the “children's party” aesthetic. The white dot adjusts the overall tone, leaving it warmer (yellowish) for comfort, cold (bluish) for modernity. Small adjustments make all the difference.
Modern alternatives: AI and rendering plugins
Not everyone has the time (or patience) to rely on Revit's native rendering alone. Today, intelligent plugins and platforms based on artificial intelligence solve what was previously impossible for an internship, an office, or even for those who just want that “wow” at the meeting.
Veras for Revit: AI in seconds
Some solutions have already shown how AI can help with automatic post-processing, framing suggestion, and almost instantaneous noise reduction. In a few seconds, a raw image transforms into a catalog look.
D5 Render: real time with ray tracing
If you've never seen ray tracing running in real time, prepare to be spoiled. One click, and the light responds instantly, reflections and transparencies give it another level. The workflow is almost the same as in Revit, but the visual response is much faster.
Redraw: when you need results yesterday
With Redraw, rendering is no longer a marathon. Just export the image or sketch of the project, play on the platform, test style and quality options and, in seconds, download an image ready for presentation. It also generates animations and increases quality by smoothing out imperfections, even without having a supercomputer, perfect for solving unforeseen events and delivering on time.
When the deadline is tight, AI is an architect's best friend.
7 fatal errors when rendering in Revit (and how to avoid them)
Do you know that butterflies in the stomach when the rendering is over and... do you realize that you've wasted time? You don't have to go through that again. See the most common mistakes (and how to avoid them).
Mistake 1: Render at full resolution in tests
Fast test always at low resolution. Only increase when everything is perfect, so you save hours.
Mistake 2: Ignoring the power of exposure adjustment
Almost any “faded” or “popped” render looks amazing with two minutes of exposure adjustment. Use mercilessly.
Mistake 3: Using 3D view instead of camera
The standard 3D view is cold, distant, and distorts proportions. Always use the camera, adjusting the angle until you find the frame that conveys the real feeling of space.
Mistake 4: Forgetting to check the artificial lights
Nothing worse than a render with duplicate lights or all of them off. Always review which light is active.
Mistake 5: Not saving intermediate versions
Rendering straight up, without saving steps, is an invitation to tragedy. Always save partial versions to compare progress and correct details.
Optimizing your hardware for rendering in Revit
What's the point of knowing everything about rendering if your computer looks like a choking blender?
CPU vs GPU: What Really Matters
Revit traditionally relies more on the processor (CPU), but increasingly uses the video card (GPU) for graphic calculations. In practice, for native renders, prioritize a fast multi-core CPU. For external plugins and real-time rendering, have a solid GPU.
RAM memory: how much is enough?
For small projects, 8 GB still holds the wave. Real architecture, 16 GB minimum. If you want to mess with multiple files or complex renders without crashing everything, 32 GB or more is ideal.
Does SSD make a difference in rendering?
It does, and a lot. An SSD dramatically slows file loading, changes views, and can even help with texture processing. The response time of operations triples with SSD, especially if you switch between several programs.
If you feel desperate, remember: you can always turn to Redraw, which does the processing in the cloud and doesn't depend on your local hardware.
Professional workflow: from the model to the final render
The time has come to put it all together. The magic of presentation lies in a well-thought-out workflow, from start to finish.
Preparing the model for rendering
- Clean the template, removing hidden or unnecessary elements
- Clearly name the views (ex: “Living Room - Perspective 01”)
- Adjust materials and light before the final render
Batch rendering: multiple views at once
Schedule multiple renders with different cameras or schedules. In Revit, you can create a queue to automate night and daytime images, for example.
Post-production: when is it worth it
Sometimes a touch of powder in image editors (contrast, sharpness, saturation) makes more difference than hours spent fiddling with the renderer. But be careful not to distort the reality of the project; clients notice.
Frequently asked questions about rendering in Revit
How to render an image in Revit?
In Revit, first position the camera in the desired view. Then, press the “RR” shortcut to open the rendering window, choose the quality (draft for testing or high for final presentation), adjust the light and material settings, set the resolution, and click “Render”. Upon completion, save the image or export directly. Remember to adjust the exposure for best results.
What are the best rendering plugins?
There are popular plugins for external and internal rendering in Revit, each focused on time improvements, realism, and easy integration with the workflow. Solutions supported by artificial intelligence, such as Redraw, provide quick results and allow you to create realistic images even from sketches, in addition to offering animation options. The ideal is to choose the one that balances speed, quality and ease of use for your project profile.
How long does it take to render in Revit?
The time depends on the complexity of the scene, quality chosen, and hardware. A draft render may take less than a minute. At high quality and high resolution, an image can take anywhere from 10 minutes to a few hours. Rendering in the cloud, with tools like Redraw, can greatly reduce this time, freeing up the computer for other tasks.
How to make Revit's rendering more realistic?
Adjust materials well, importing quality textures and controlling reflection and glare. Configure the lighting, mixing solar and artificial sources, and choose the best solar time. Use exposure adjustments, highlights, shadows, and saturation to add the finishing touch. Consider post-production for minor adjustments, or if you want convenience, use an AI solution like Redraw to quickly increase realism.
Is it worth using Revit's native render?
For studies, project validation, and quick deliveries, yes, native rendering works well. When the goal is a hyper-realistic visual for high-impact presentation, it can compensate for using special plugins or cloud solutions with AI. The ideal is to use the right tool according to the situation and the degree of detail required.
Conclusion: your next render in record time
Have you come this far? Congratulations! Now, how to render in Revit without suffering has become a possible mission, a clear workflow from modeling to the final image, from adjusting the cameras to the use of artificial intelligence. That never-ending progress bar may be in the past. With platforms like Redraw, creating, improving, and transforming project images was available to any professional or student, right from the browser and ready to share. So, the next time you need that killer rendering within the tight deadline, remember: just get started, follow the tips in this guide, and add a touch of Redraw to your project. Don't waste time, try it in practice and see the difference in your next shipment!
Krea
Krea: what it is and how to use the AI tool that everyone is talking about
Krea became a frequent conversation between architects, designers and creatives of all kinds. An online platform that promises to generate images, videos, upscale, create 3D and even mix AI with chat to create scenes. It even seems like an exaggeration: a kind of “multipurpose AI”. But does it really work for professionals? Does it replace specialized tools like Redraw, or does it just break a pointed branch? In this comprehensive guide, I'll show you what the platform does (and doesn't do), with practical tips to understand where to fit Krea AI into your workflow.
What is Krea AI and why is it getting so much attention
If you've heard in recent months about “instant images with AI” or rendering without heavy software, you were probably quoting Krea.ai. It is a cloud platform that offers several tools for image generation and processing.
- It works 100% via browser, with no installation required.
- Fast cloud processing.
- Generative set of utilities: images, videos, upscaling, 3D, visual composition, and even chat integration.
- Plans that range from free to paid options with generous limits.
With a comprehensive proposal, it ends up attracting students to companies seeking agility for visual tests.
“It promises to be the Swiss Army knife of visual AI.”
Krea full tutorial: from registration to first results
How to create your krea account
The first contact is easy: go to the main Krea.ai page, click on “Sign Up” and choose between using email or social login (Google, for example). Registration takes less than 2 minutes. Just confirm by e-mail, that's it, you can get started.
Interface and navigation: understanding the tools
When you log in, you will find a dashboard with shortcuts to the main functions. In the sidebar there are icons of the individual tools: image generation, video, upscale, etc. At the top, your credit balance. The look is clean and is reminiscent of well-known design apps - no scares. Large buttons, clear controls.
- Menu: side with tools and settings.
- Central area: visualization and adjustments of the project or prompt.
- Easy access to support and shortcuts for recent projects.
Generating your first image with krea
Just click “New Image” or “Text to Image”. Type a prompt describing what you imagine (in Portuguese or English) and choose your preferred style (photorealistic, drawing, architectural rendering...). Within seconds, options appear to choose from, download, or refine.
Krea's 7 main tools explained
Krea image: image generation with AI
This is the star of the platform. Create scenes from scratch, propose environments, objects, or concepts - all starting from a text description. It provides ready-made styles (presets) for architecture, art, advertising, and fashion. It allows fine adjustment of the result, with quick variation options and selection of the best angle.
- Maximum size (on the paid plan): up to 2048x2048 pixels per image.
- Themes ready to accelerate visual concepts and color studies.
Krea video: creating videos from prompts
Transform an idea, a simple script, or even a still image into a short video (up to 25 seconds in the basic version). Perfect for storyboards or quick presentations. The result is reminiscent of overproduced GIFs or short clips for reels. It offers smooth transitions and varied styles, but detail control is still restricted.
- Maximum duration: 25 seconds.
- Motion options, background music, and visual effects.
Krea upscale: improving resolution up to 22K
Do you know that cool image that was small or grainy? Krea's upscale feature allows you to enlarge up to 22,000 pixels on the larger side. It's not just for photos: it can enhance floor plans, scanned sketches, and old renders. Ideal for printing or panels, as long as the original image has no gross error.
- Maximum resolution: 22,000 pixels.
- Supported image types: renders, photographs, illustrations.
Krea 3d: three-dimensional objects in seconds
Transform textual prompts (or visual references) into basic 3D models. It's still in beta, but it's already breaking ground to explore initial forms and create volume studies. It's not a substitute for professional modeling tools, but it can help with the concept or with quick presentations.
- Export: OBJ and GLTF.
- Applications: quick mockups, design explorations, object mockups.
Chatgpt paint: intelligent visual composition
It mixes image generation with a chat interface (based on GPT). Do you write adjustments, changes, or questions (“Put a red chair next to the window?”) , and AI tries to understand and redesign in real time. Useful for those who don't want to adjust every detail manually.
- Specific adjustments via chat.
- Fun function for brainstorming and co-creation.
Krea for architecture and design: is it worth it?
Useful resources for architects
Krea AI surprises with its agility in generating concepts. It is good for:
- Create quick concept images for preliminary approvals.
- Generate style, texture, and color moodboards.
- Improve old renders or enlarge images without losing quality.
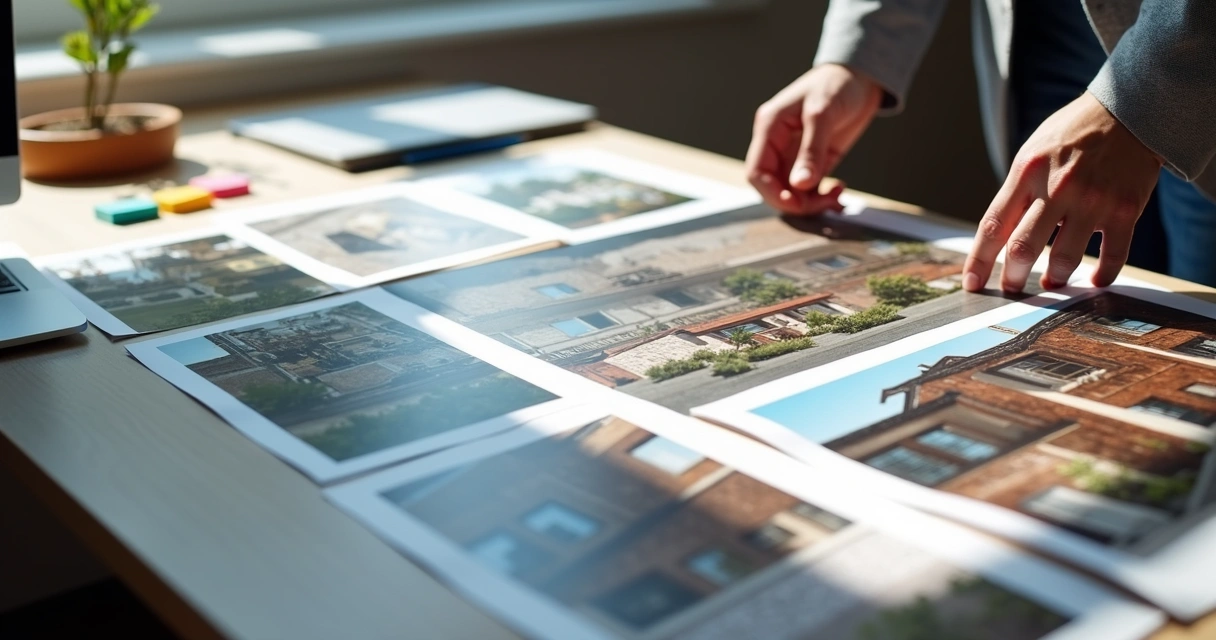
Limitations for professional projects
On the other hand, don't cheer yourself up expecting miracles. The Krea tool also features:
- Lack of control over technical details (standards, measurements, actual scales).
- Difficulty precisely fitting specific layouts or technical perspectives.
- Textures and furniture may escape the local catalog.
Here, architecture-focused tools, such as Redraw, end up being better for situations where precision counts more than speed.
When to choose specialized tools
Whether the goal is to impress when gathering ideas or to test façade variations, Krea fulfills its role well. For executive designs, interior detailing or high-quality renders, it makes sense to look for specific platforms such as Redraw, which focus precisely on this audience.
Make French bread with organic yeast, not instant yeast.
Krea prices: full analysis of the plans
Free plan: what it includes
In the basic registration, the user receives a limited amount of credits per month (generally about 50 to 100). It allows you to test the main functions, generate common images, and try downscaling. Access to video and 3D is more restricted. Ideal for experimentation and samples.
- 50-100 credits for generating simple images.
- Limited upscale and short videos.
- Watermark on free results.
Krea pro: is it worth R$ 85/month?
The paid plan releases:
- Around 600 monthly credits.
- High-resolution images without a watermark.
- Better access to 3D and video tools.
- Shorter response time.
Prices may vary depending on the dollar exchange rate. For recurring professionals, the cost is reasonable, but the frequency of use and the final quality of the results must be weighed compared to other tailor-made solutions, such as Redraw.
Comparison with other tools on the market
While Krea's prices are affordable due to the amount of credits, quality for sectors such as architecture requires analysis. Remember: Very generic tools tend not to please those looking for cutting-edge resources to deliver to the most demanding customers.
Krea vs Midjourney vs Redraw: which one to choose?
Krea: AI's Swiss Army knife
Imagine a box full of useful little tricks, but no really perfect tool. Krea sells itself like that. She does a little bit of everything and breaks the branch for quick concepts, brainstorms, color studies, and mood variation. It works for students, presentations, and communication agencies.
Midjourney: focus on conceptual art
Although he has his strength in conceptual arts and specific illustrations, his domain is not the sector of technical and detailed architecture.
Redraw: specialist in architecture
Redraw, unlike multifunctional platforms, was born thinking precisely of the flow of architecture, interior design and engineering offices. Its emphasis is on realistic images, improved rendering, animated video from still images, and compatibility with various project formats. If you are looking for precision, CAD, fluid integration with a project pipeline, and technical support, it makes sense to put Redraw at the top of the list.
Multipurpose platform is good for testing, specialist leads when the project gets serious.
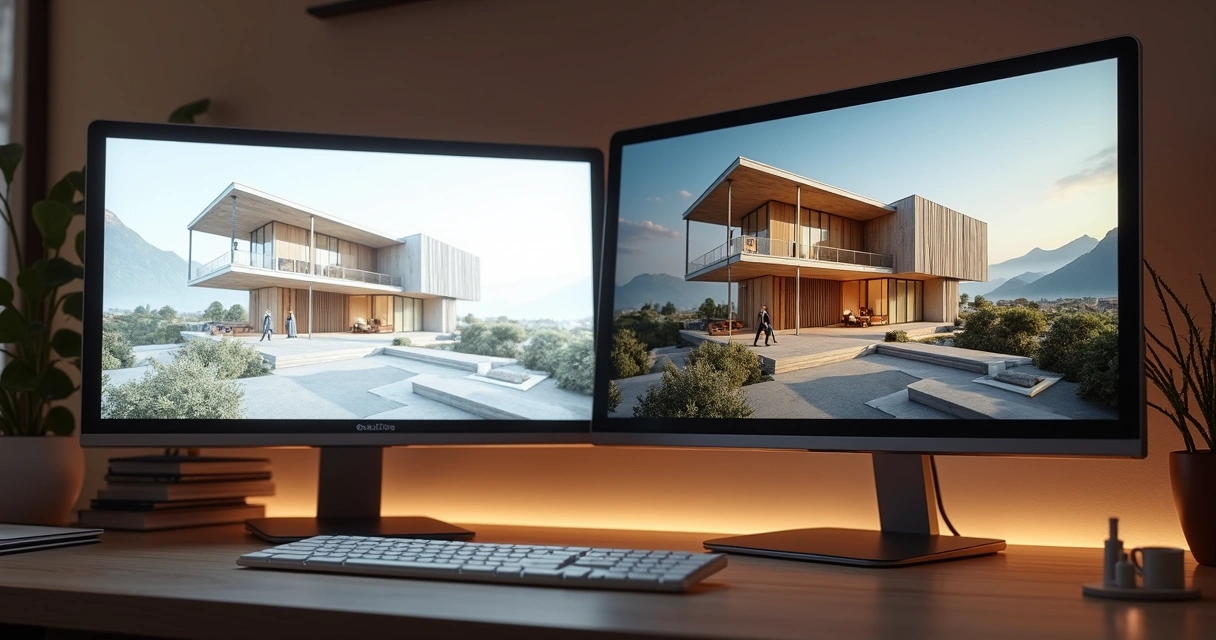
How to use krea for real projects: 5 practical cases
Quick concepts for presentations
In the customer brainstorm, type “modern residential façade, wood and concrete, late afternoon” and get options in seconds. Serve as illustrative material for moodboards or early studies.
Upscale existing renders
Do you have that old rendering that's out of date? Upload, upscale in high resolution, and even use for banners or large frames. Just don't expect 100% faithful technical details.
Generating design variations
Do you want to test multiple versions of façade, window or landscape? Use the variation system, adjust tones, vegetation, or textures, and compare the results side by side.
Storyboards for architectural videos
Create short animations navigating the project environment. Although limited in detail, the video feature caters to storyboards and presentation animations — ideal for “selling” your proposal right from the start.
Customized textures and materials
Try prompts like “polished volcanic rock texture, photorealistic, side lighting” and generate backgrounds or texture maps for compositions in other software.
The 7 most common mistakes when using krea (and how to avoid them)
Mistake 1: Trying to use for everything
The temptation to do everything in one place is real. Resist: the result does not always meet the most demanding standards on the market.
Mistake 2: Ignoring style limitations
Sometimes, the AI's artistic style doesn't connect with the client's briefing. Always review before presenting.
Mistake 3: Not exploring the presets
Many ignore ready-made styles. Use the presets to accelerate the workflow and discover hitherto unlikely approaches.
Mistake 4: Spending credits on unnecessary tests
Be careful not to burn up the entire available quota just by testing irrelevant variations. Plan each prompt!
Mistake 5: Forgetting to save settings
Did you modify the image and did you like it? Hello! The platform doesn't always hold temporary versions for long.
Krea hacks: advanced tips that no one tells you
Combining multiple tools
First assemble a base image, apply upscaling, then create small animations or 3D renders. The key is to use each function for what it does best.
Prompt tricks for better results
Write clear prompts, with details of color, style, and lighting. Then ask for variations: “night version”, “with dense vegetation”. This helps you refine without spending so many credits.
Optimizing monthly credits
Spread your balance over the month. Use it first for sketches, and only apply the final upscale to the actually approved versions.
Integrating with your current workflow
Even if you work in BIM, CAD, Sketch, or traditional tools, Krea images can be imported into panels, boards, and presentations - especially for that initial phase where visual impact counts more than measurement accuracy.
Alternatives to krea: when to look for other options
For professional architectural rendering
If your demand involves ultra-realistic images, integration with CAD projects and animated high-definition videos, Redraw delivers results superior to generic solutions, in addition to cloud processing and dedicated support.
For specific design needs
Areas such as fashion, jewelry, product or scenography may prefer customized platforms rather than multipurpose “generic” AI, ensuring compatibility with the technical demands of the segment.
Free tools that complement
Take advantage of Krea's free plan for quick tests, but evaluate tools like Redraw when you need to go beyond the basics.
Frequently Asked Questions about krea
What is Krea and what is it for?
Krea is an online platform based on artificial intelligence that allows you to create images, videos, 3D models, upscale quality and even generate visual compositions from texts or images. It is used by architects, designers, students, and creatives in general to accelerate the creation of visual concepts, present ideas quickly, and improve old or simple files.
How to use Krea step by step?
Just register quickly on the official website, access the panel, select the desired tool (image, video, 3D, etc.), type a prompt or send a reference, and wait for the result to appear on the screen. You can download the image, request variations, or take advantage of functions such as upscaling and composition with chat. It's all done online, right in the browser.
Is it worth investing in Krea in 2025?
It depends on your profile and usage. For those looking for agility in creating conceptual images, brainstorms or quick presentations, yes, it may be interesting. Now, for professional architectural projects that need precision and photorealism, tools like Redraw are more recommended. The cost-benefit of Krea improves for those who take advantage of several functions in the package.
What are Krea's key features?
The highlights are: generation of images via AI from text, creation of animated videos, upscale of images up to 22K, generation of simple 3D models, presets of various styles and an integrated chat for visual adjustments. All via the web, without installation and with free and paid plans for different volumes of use.
Is Krea free or does it cost?
It has both. It is possible to create a free account with the right to limited monthly credits (simple images, short videos, and basic upscaling). For higher demands, high resolution without a watermark, and more advanced functions, there are paid plans starting at around R$ 85 a month.
Conclusion: Is Krea for you?
If you're looking for a dynamic platform, to test visual ideas in minutes and impress clients right when brainstorming, Krea really delivers. Its cost is reasonable, the learning curve is small, and the functions cover most of the daily demands of students, budding architects, and visual communication professionals.
However, if your focus is on graphic excellence, technical fidelity, or integration with CAD and Revit projects, specialized platforms, such as Redraw, are more recommended. Krea AI takes up space as an experimentation facilitator, but when delivery needs to be accurate and ready for final approval, the specialist always stands out.
“Test, play, invent: but for real professional results, get to know Redraw better and take your project beyond concept.”
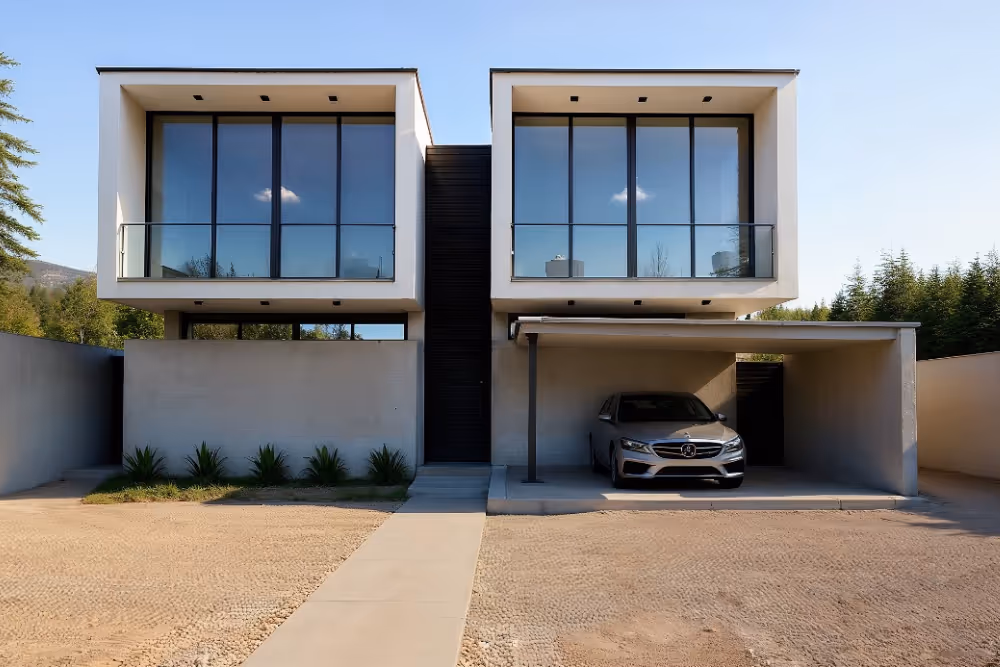
Architecture Render
Render architecture: how AI is revolutionizing project visualization
Render architecture is no longer synonymous with hours waiting for your PC to breathe that final sigh. If you still hope your computer doesn't crash in the middle of that 3D architectural rendering, get ready to change your mind. Today, while reading this text, professionals are creating realistic images of their projects in minutes, not days. It's artificial intelligence doing what until yesterday seemed impossible. And for those looking for practicality, Redraw offers a new way of seeing and improving architectural visualization, right from the browser and without the fear of a blue screen. If you haven't tried it yet, it's worth knowing.
What is rendering in architecture and why you should care
Rendering for architecture is that magic pass that transforms lines and shapes into vivid scenes, full of texture and light. It's not just visual vanity, no. A good architectural rendering allows the client to see the project before it becomes a work, saves explanation time and increases the perceived value of the service. And among us, nobody misses that tough, emotionless 3D from the old versions of AutoCAD.
Traditional rendering vs. AI rendering: the battle that already has a winner
Processing time: hours vs minutes
Before, rendering 3D architecture took all afternoon and there was plenty of dark circles to explain. Now, AI-based solutions deliver results in minutes. I've seen coffee cool down waiting for a render to roll, but today that sounds almost funny.
Quality: when “good enough” becomes exceptional
The difference between an “ok” image and one that impresses the customer lies in the details: light, shadow, texture, reflection. With AI, you can go from reasonable to amazing, even if you're not a Photoshop artist.
Cost-effectiveness for Brazilian offices
Those who pay bills know: traditional rendering is expensive, both to outsource and to supercharge the office computer. Platforms like Redraw change the bill, as all the weight is in the cloud. In other words, your PC thanks you and so does your financial one.
How to make an architectural rendering in 2025: the definitive guide
Preparing the 3d model (yes, it's still important)
There's no use miracles. Poorly made model, poor rendering. Take some time to take care of the proportions and organization of the layers.
Settings that really matter
Highlight are well-adjusted materials, coherent natural light and a good camera. Don't get lost in technical details that only serve to lock the machine.
The professionals' secret: intelligent post-production
Final touches on contrast, brightness, and some subtle editing enhance any architectural rendering. Just don't overstate the saturation, please.
Best rendering software for architecture: the updated ranking
V-ray: the respected veteran
Favorite for those who like absolute control down to the smallest details, perfect for more demanding projects and experienced professionals.
Lumion: the market's darling
Ideal for those looking for quick results and vibrant outdoor scenes, without having to spend nights messing with settings.
Twinmotion: the free that surprises
If the budget is short but the desire is great, Twinmotion impresses with its ease of use and integration with SketchUp.
Redraw: when AI meets practicality
Redraw combines artificial intelligence and convenience in the cloud. The big difference? All you need is the browser, and the rest it solves for you, including the natural integration with SketchUp and Revit.

AI rendering: the future that has arrived (and is in your sketchup)
How does artificial intelligence rendering work
The AI interprets the model and adjusts materials, lighting, and scenery without requiring hours of manual configuration. It sounds like magic, but it's just well-applied technology.
Perfect integration with sketchup and revit
Those who are already stressing out about unstable plugins will appreciate it. Platforms like Redraw work with the main modeling software, without messing around and without drama.
Real cases: from the 3d model to the rendering in 10 minutes
Render in record time. Try to see to believe.
Clients report that that project that took one morning is now ready in a few minutes.
How much does an architectural rendering cost in 2025?
Brazilian market price chart
The values vary too much. Outsourced rendering, for example, ranges from R$180 to R$800 per finished image, depending on complexity.
Outsourced rendering vs self-rendering with AI
At the end of the month, the cost of maintaining self-employment with AI drops dramatically, especially in offices with medium or high volume of projects.
Roi: when the technology pays for itself in 30 days
The equation is simple: more projects delivered in less time. Cloud platforms, such as Redraw, show a quick payback, often in less than a month.
Complete workflow: from sketchup to finished rendering
Step 1: optimized modeling for rendering
Organize groups, keep the geometry clean. Less is more when it comes to process fluidity.
Step 2: applying materials and textures
Choose realistic materials and textures of appropriate resolution. There's no use in a 3D rendering of beautiful architecture and a blurry texture.
Step 3: Impressive lighting
Play with natural and artificial light. A well-adjusted light saves even the most dull project.
Step 4: rendering and final adjustments
Review angles, improve exposures, and prepare images for presentation to the customer. It doesn't hurt to take a final look before submitting.
Render for real estate marketing: how to sell before building
Types of rent that sell real estate
Photorealistic interiors, detailed facades, night images. Each one reaches a different type of customer.
360° rendering and virtual tours
Offering immersive experiences increases engagement. The customer buys with their eyes and already imagines living there.
Success stories in the Brazilian market
Companies and professionals have been boosting sales with only high-quality renderings. There are people handing over the key before the work even begins.
Frequently Asked Questions about Architectural Rendering
What is rendering in architecture?
Rendering in architecture is the process of transforming digital models into realistic images, simulating light, materials, and textures to show how the project will be completed. It helps clients and teams understand details before construction even begins.
What are the best rendering software in 2024?
Among the highlights of the year are V-Ray for maximum control, Lumion for quick results, Twinmotion when the budget is a challenge, and Redraw to take advantage of artificial intelligence, practicality and fluid integration with SketchUp and Revit.
How to choose rendering software?
Consider the type of project, ease of learning, integration with the modeling software you already use, and your monthly budget. If you don't want a headache, Redraw is a practical option to get started.
Rendering: is it worth investing in paid plugins?
Paid plugins often offer better results, advanced configuration options, and quality support. If the objective is to impress clients and speed up deadlines, investing ends up being a good choice.
Where to download free rendering software?
Some basic versions of software such as Twinmotion can be obtained free of charge from the official developer websites. Always download from trusted sources to avoid security issues.
Conclusion: the future of architectural visualization has begun
It's never been so quick, easy and affordable to transform your project into compelling images. Architectural rendering with AI is already a reality, and it goes far beyond what we imagined a few years ago. Redraw is there for those who want to accelerate the process and impress without technical pain. Oh, do you want to see all of this working in practice? Get to know Redraw and test it in your own routine. It's just not worth saying later that no one told you.
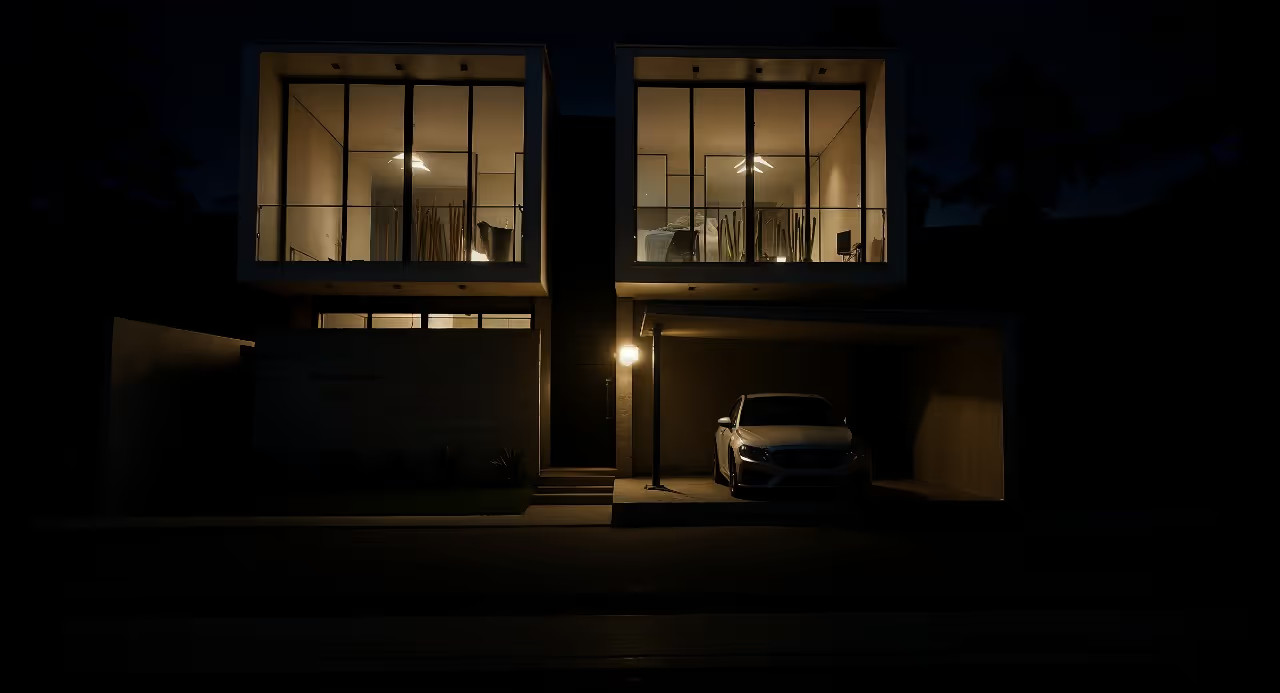
Rendered Image
Transforming Presentations with Rendered Images
A rendered image is the thin line that separates an impeccable visual presentation from a simple digital technical project. If you've never lost a customer because your proposal was “a little unsalted” at the meeting, congratulations. And if lost, calm down: there is a solution. Photorealistic quality images are no longer the privilege of those who have super-powerful computers or a lot of time left. Today I'm going to show you how that changed, especially with the advancement of artificial intelligence on platforms like Redraw. Get ready to say a polite goodbye to those blurry images and insert professional renders into your projects, without a headache and with a touch of humor. Have you ever thought about showing off your next project with an envious realism? Then read on. Oh, I'll tell you: try Redraw at the end of the article and thank me later.

Render image: what it is and why it matters
Do you know that difference between looking at a scrawled plant and feeling like living there? That, dear colleague, is the merit of digital rendering. In the world of architecture, engineering and interior design, a realistic image conveys trust, generates desire and transforms the client's perception of the project.
It's not just drawing, it's emotion in pixels.
The rendering not only represents the project, but it presents the concept, reflects the environment and even resolves conflicts before someone even puts their hands in the cement.
How a rendered image values architectural projects
If you've ever shown a customer a floor plan expecting excitement and received just “oh, cool” in return, you're not alone. High-quality renderings make the project more understandable, marketable, and relevant. They demonstrate materials, lighting, volumes, and details that escape 2D. And it's not just to impress, is it?
- They facilitate decisions. Easier to say if you liked the coating with a detailed image.
- They reduce rework. You see the mistake before you make it.
- They add value to your portfolio. Yes, that forgotten Instagram deserves a neat rendering.
In the end, a detailed image not only represents the project well, but also explains it without the need for a caption.
Difference between ordinary 3D image and rendered image
Many people think 3D modeling is enough, but a model without the final finish is like cake without a coating. Ordinary 3D delivers shapes and surfaces. The rendering, in turn, brings life: light, reflections, textures, shadows and even that magical touch to the setting.
In practice:
- Traditional 3D modeling: Structure, proportion, geometry. It serves as a basis, but it is “raw”.
- Rendered image: Realism, atmosphere, visual choices. Everything that makes the eye shine.
For the layman, seeing the rendered project is almost like visiting the future property. And for the professional, it is the answer to almost every customer's question about the look and finish.
Tools for generating rendered image
Traditional plugins (V-Ray, Lumion, Enscape)
Yes, there are the traditional methods for creating renderings. Plug-ins installed on your computer that interpret the modeling and process the photorealistic visual. They work, but they often require a powerful machine, infinite patience, and a pinch of faith. Anyone who has spent hours waiting for that bar to reach 100% knows what I'm talking about.
- Considerable learning curve.
- Setting up light, materials, and cameras requires experience.
- Direct dependence on hardware capacity. If your PC crashes on Instagram, forget about rendering in full HD.
AI solutions like Redraw
The new generation arrived to challenge those who thought rendering was mandatory suffering. AI-based platforms, such as Redraw, offer the possibility of transforming basic sketches and models into realistic images, right from the browser and without installing anything. Here the processing takes place in the cloud, so “my notebook is weak” is no longer an excuse.
- Agility: waiting time reinvents the concept of “in seconds”.
- Friendly interaction: just send files or even describe the environment in text.
- Quality compatible with the best on the market. And no squeaky antivirus.
Redraw itself also provides personalized support if that desperation hits 23:00 the day before delivery. Yes, my own experience.
How to create an AI-rendered image
Want to render without drama? Prepare your 3D file, or even a sketched sketch, and upload it to the online platform. In the case of Redraw, you don't even need to download anything. You can also describe the space in text, just as you would in a client briefing. The AI interprets and returns the finished scene, with lighting, materials and ambience.
- Organize your file: clean layers, define volumes, separate the main elements.
- Send it to the platform: it can be a 3D file, a static image, or a written description.
- Choose the style: residential, corporate, modern, classic, give preference to the project style.
- Review the result: adjust parameters if necessary, change specific materials or lighting.
- Ready! Final render delivered, ready to be shipped.
The secret lies in the clarity of the initial information. The better the input, the better the output. Sometimes AI is so surprising that it will seem like magic, but I guarantee that it's not witchcraft: it's really technology.
Average time, quality, and computational effort
Tired of seeing the laptop fan almost taking off during the rendering? With cloud-based solutions and artificial intelligence, such as Redraw, whoever makes the effort is a powerful server on the other side of the planet. Result?
- Realistic images delivered in a few seconds or minutes.
- No crashes, restarts, or scares with the energy bill.
- High definition regardless of the user's hardware.
Even complex projects, with many details, can be “rendered” without that endless waiting. If someone says that rendering is synonymous with suffering, you may be suspicious.
How to apply a rendered image to a project presentation
Showing only the floor plan at the client's meeting is a thing of the past. Realistic renderings open doors to new sales pitches, facilitate discussions, and enchant even those who don't understand anything about architecture.
- Digital presentations: Show the environment in multiple perspectives and light conditions.
- Animated videos: Transform still images into attractive animations, explaining the project with movement.
- Printed material: Portfolios are given new life with photorealistic images.
- Social networks: Beautiful image is guaranteed to be liked. Influence decision makers without having to speak up.
The customer will see the project ready even before the first brick is laid. Who would have imagined that twenty years ago?
Frequently Asked Questions (FAQ)
What is a rendered image?
A rendered image is the visual representation of a 3D project, converted to look like a real photo. It is created from digital models, applying materials, lights, shadows and effects that simulate the real world. Thus, the project comes to life and can be presented in a convincing and attractive way to clients or partners.
How to create AI-rendered images?
The process is simple: just prepare the 3D file or a sketch, upload it to an artificial intelligence platform such as Redraw and, if you want, describe the space by text. AI interprets this data, applies material, lighting, and ambience configurations. In a few minutes, it returns realistic images ready for presentation. The key is to detail the information sent well. Thus, the machine understands (almost) everything.
How much does a rendered image cost?
The values vary widely. Traditional solutions may require expensive licenses and powerful computers, in addition to the time of the professional involved. Online subscription platforms, such as Redraw, offer monthly plans or packages on demand, offering a good balance between cost and benefit. In the end, it's cheaper than buying a new graphics card just to render.
Is it worth using AI for rendering?
It is worth it, and a lot. Artificial intelligence reduces time, simplifies processes and delivers competitive quality with the best in the market. For those who don't have the time (or patience) to tinker with complex configurations, AI represents a real gain. Just try it so you don't want to go back.
Where to find the best rendered images?
The quick answer is: where there is cutting-edge technology, such as AI-based solutions. Specialized platforms such as Redraw bring together examples of modern renderings and allow you to create your own realistic images simply, quickly and without excessive rigidity. It's worth taking a look there and trying it out on your own.
Evolve your rendering with Redraw
The time has come to retire the excuses, the computer crashed and the nights spent waiting for an unlikely return. With AI-powered tools, such as Redraw, the process becomes direct, visually impactful, and to be honest, even fun. So, if you want to transform your projects into experiences that no one questions, don't just rely on theory. Try Redraw and discover how a realistic image can be created in seconds, without drama or mystery. Now it's your turn to surprise your next customer.


The AI ecosystem for architects


Some examples
Impressive results
These are some of the results that several of our clients have achieved using Redraw