Alexandre is currently the marketing director, but he previously worked as an architect specializing in BIM.


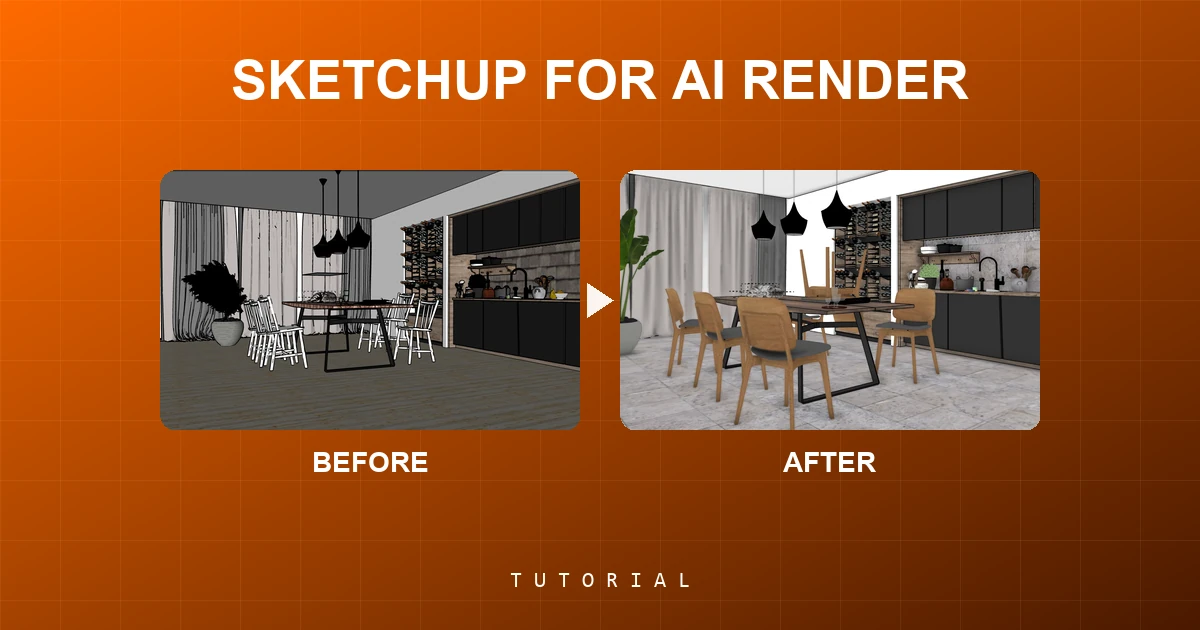
A poorly prepared 3D model produces mediocre renders — and the AI is not to blame. Optimize SketchUp in 5 minutes for great AI renders.
Redraw
Start transforming your projects today using Redraw.


The AI boom has brought a huge wave of professionals generating images with artificial intelligence. But most skip the most important step: preparing the 3D model before rendering.
The result? Mediocre renders. Blown-out textures. Pointless angles. And it is not the AI's fault.
In this guide you will see, in practice, how to optimize your 3D model in SketchUp to get the most out of AI rendering. And the best part: the same tips work for Revit, ArchiCAD, and Promob.
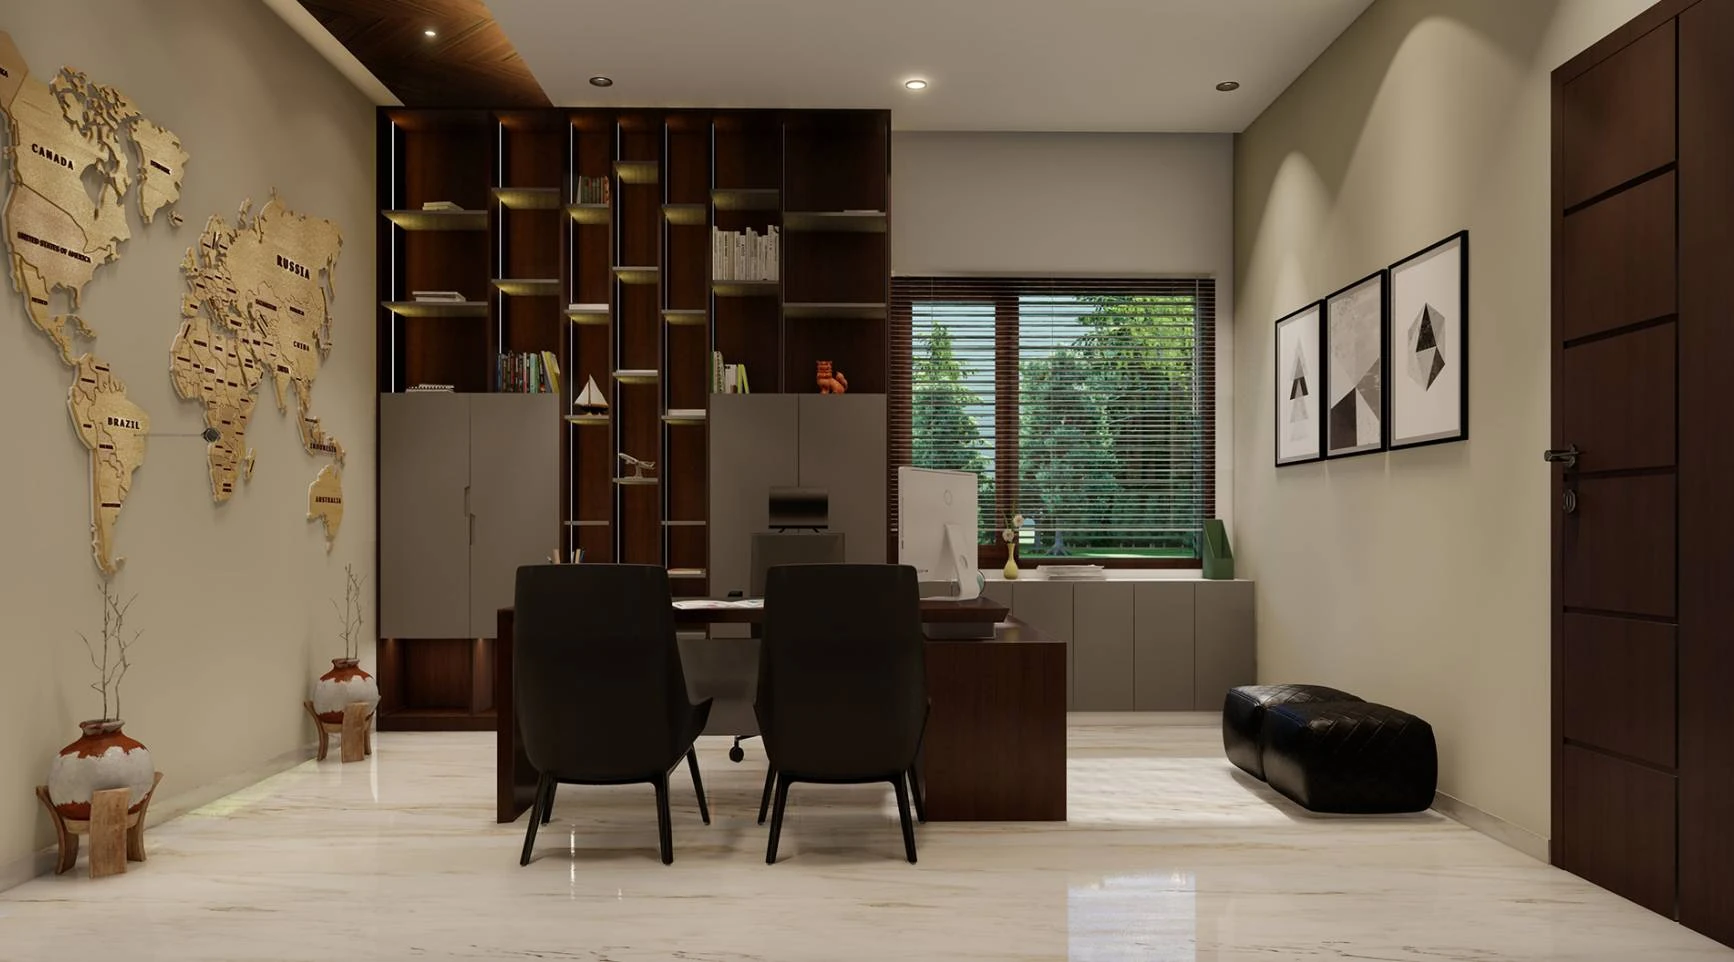
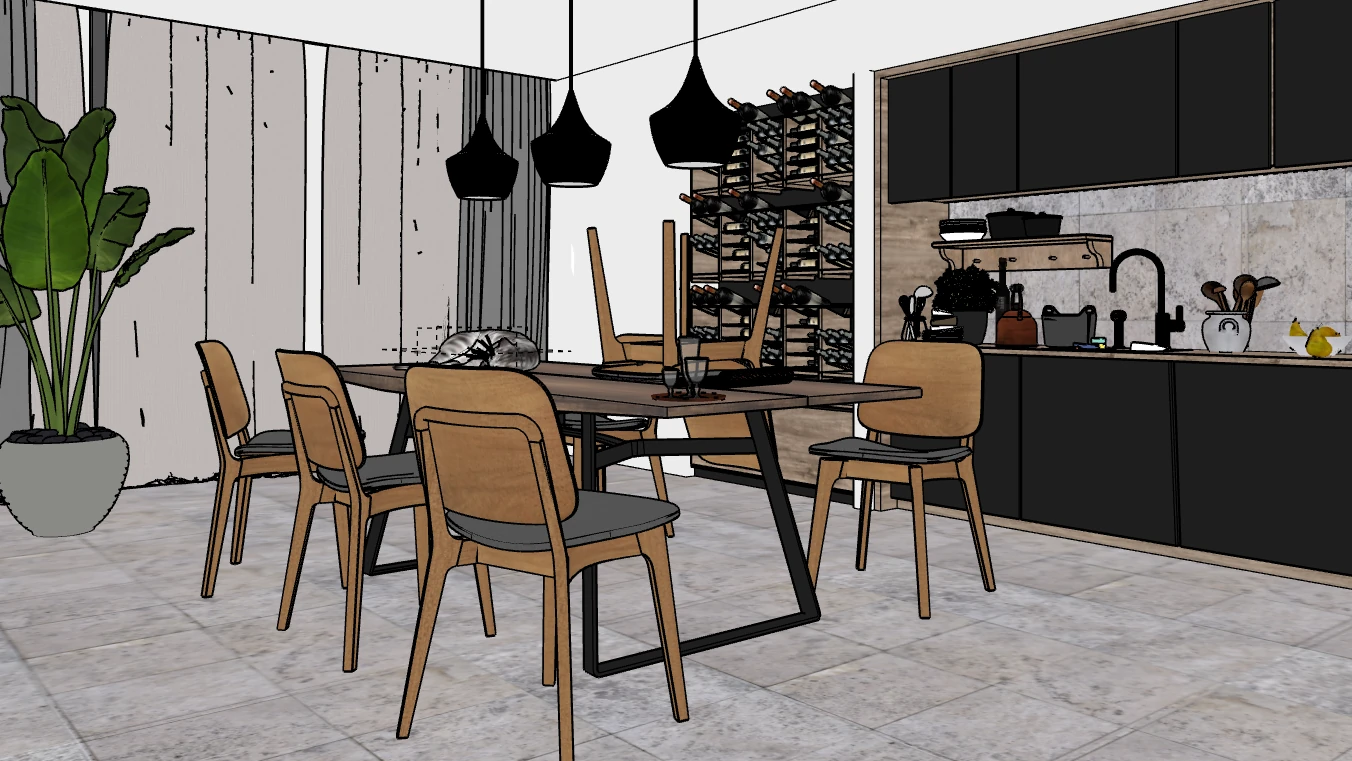
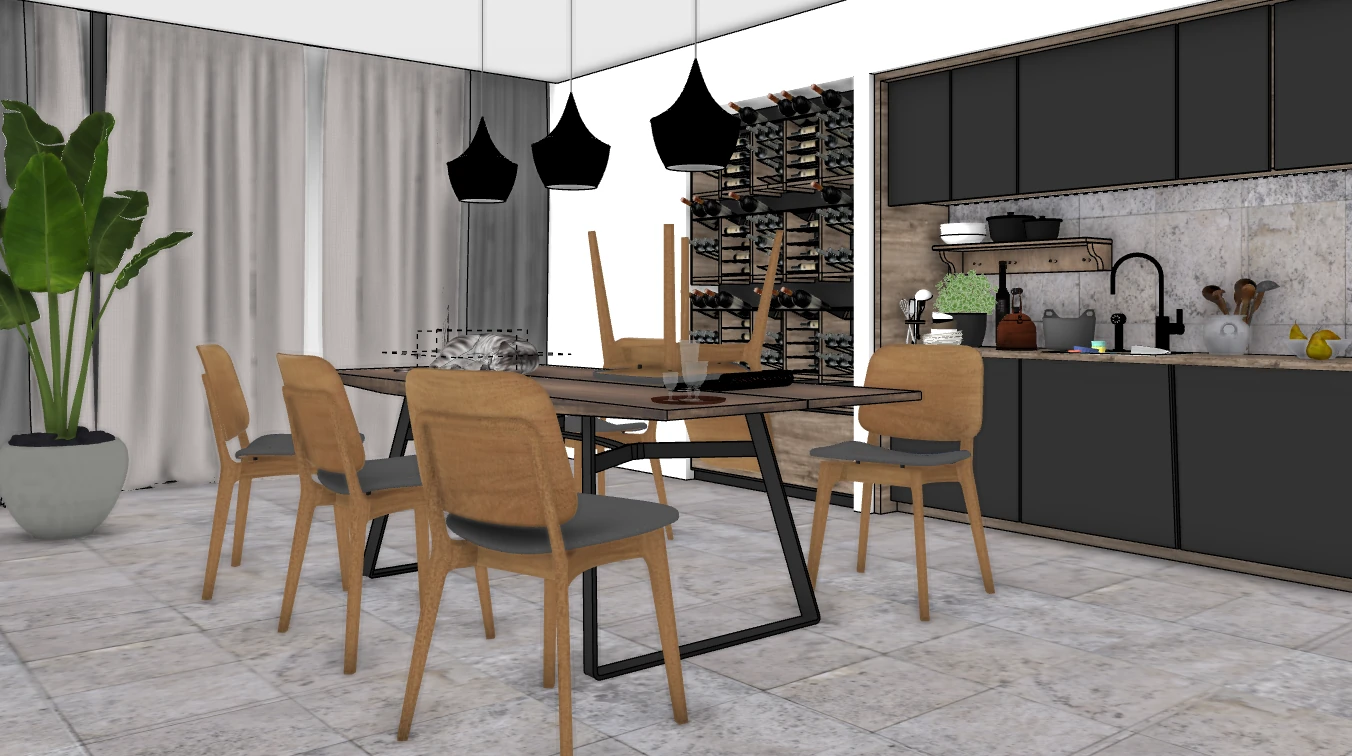
Look at this image. It is the typical screenshot taken from SketchUp with no attention to angle, lighting, or detail. Floating elements, off-scale textures. A classic scenario.
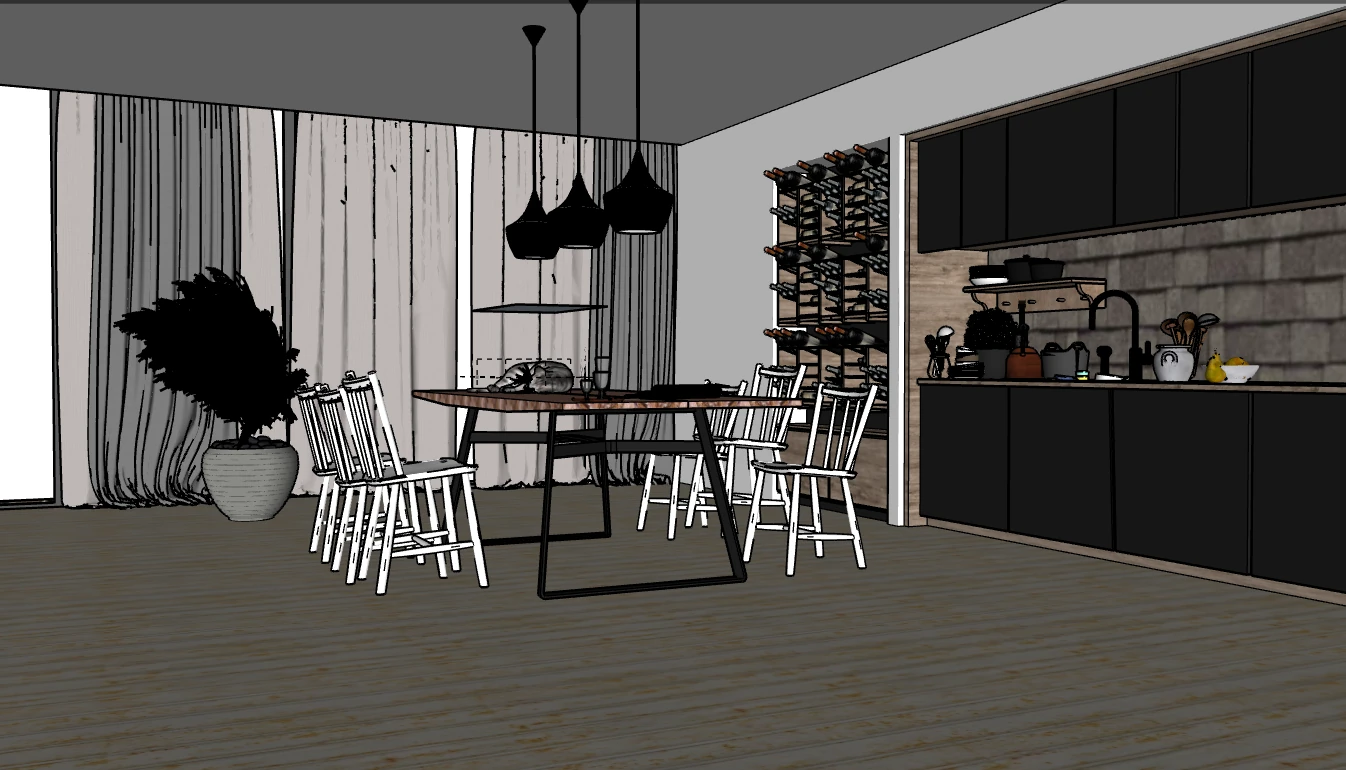
Even using advanced AI rendering models like Redraw v4 Lumi, results with this type of image will not be good. No care was taken in preparing the model.
What is wrong with this image?
Wide, poorly positioned camera angle. Completely dark vegetation blocks that do not match the selected plants. Floor, table, and kitchen wall textures at the wrong scale — far from what will actually be built. Chairs with poor geometry and no textures.
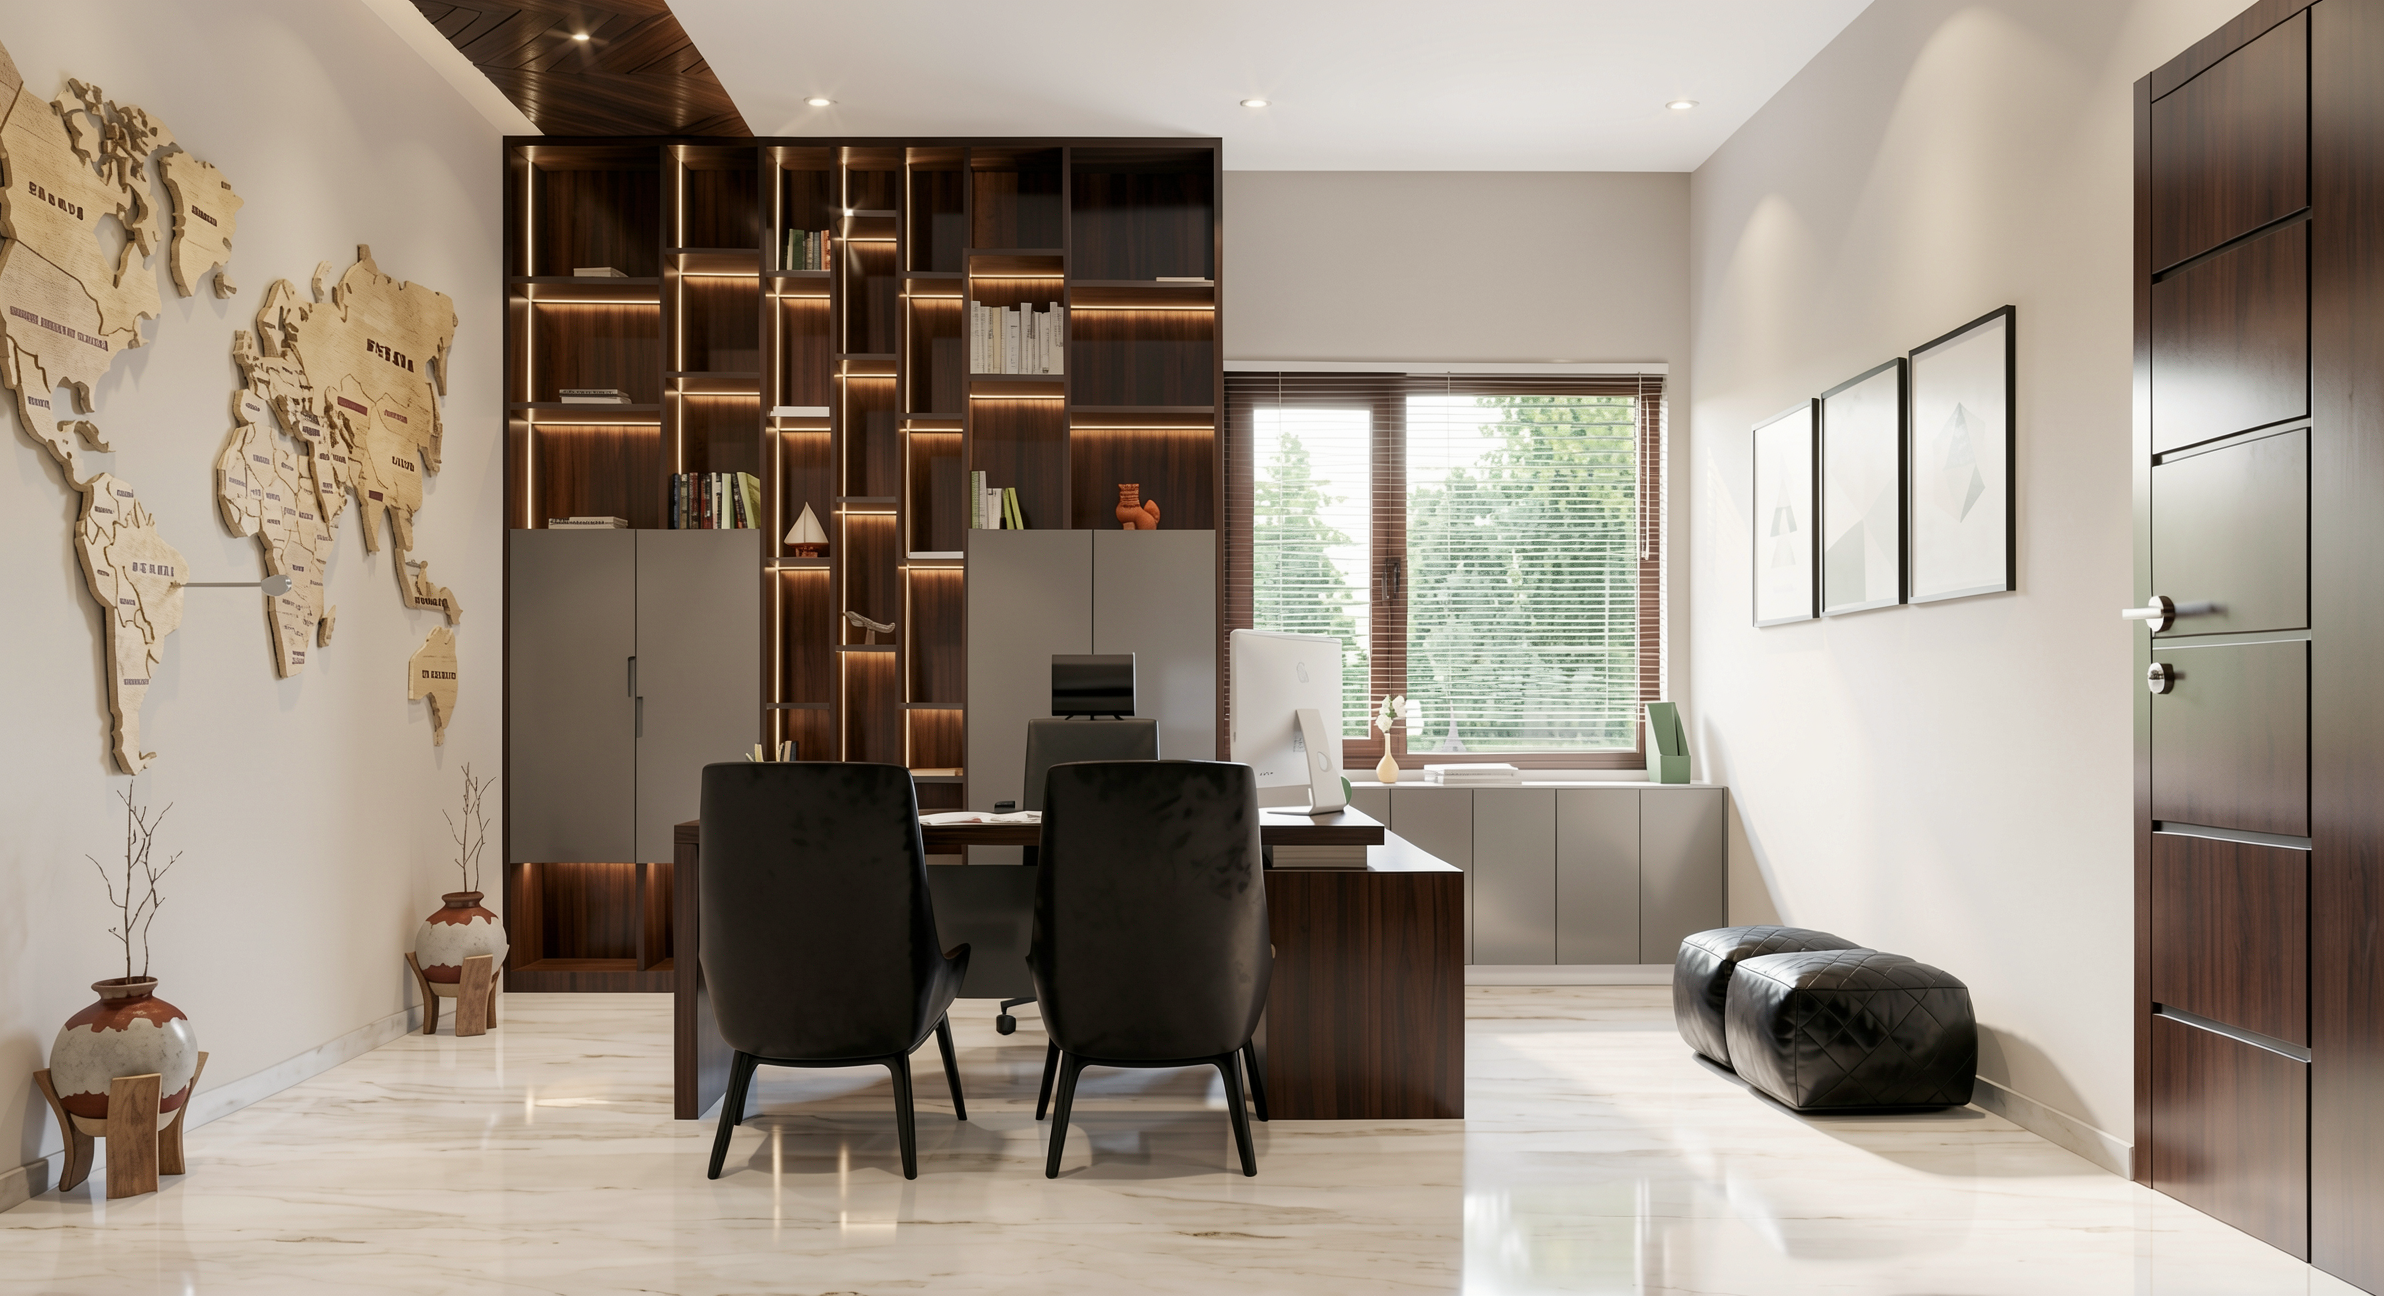
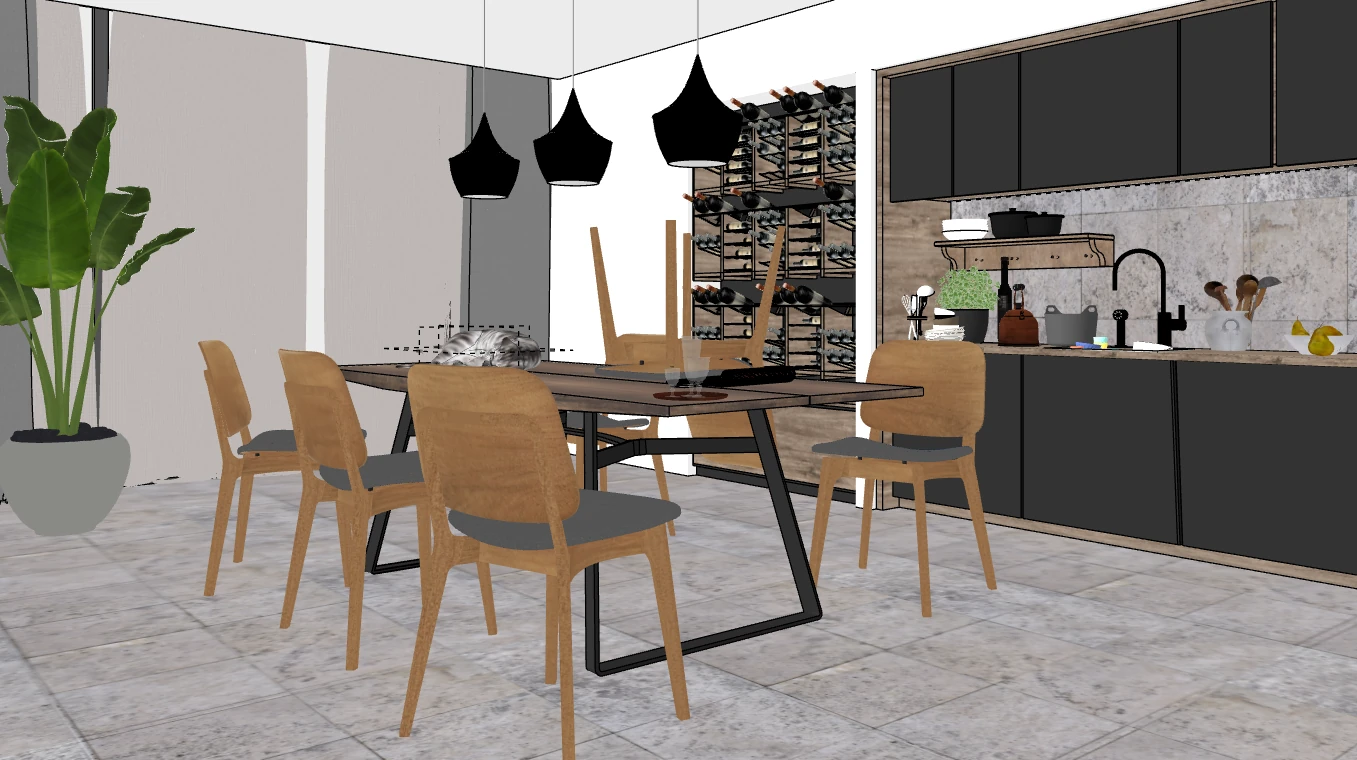
This is the typical half-baked AI render. But there is a fix. With just 5 minutes of optimization, the result changes completely. Here is the process.
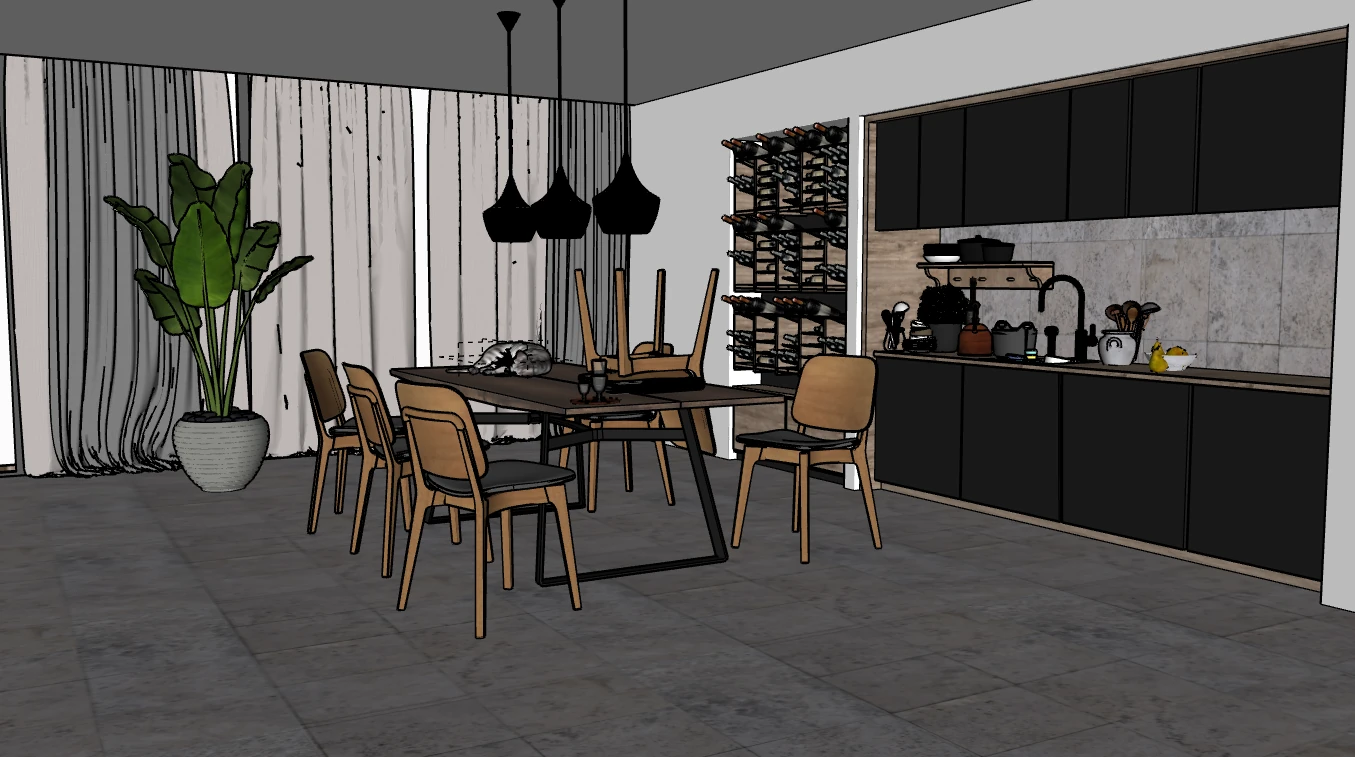
What was done here? Removal of bad blocks: dark vegetation, ugly chairs, and floating elements. New textures that make sense for the project, at the real scale. Floor replaced, wall replaced, table replaced. Everything as close as possible to the actual execution of the project.
It may seem like a small thing, but this clean-up alone drastically changes the AI result.
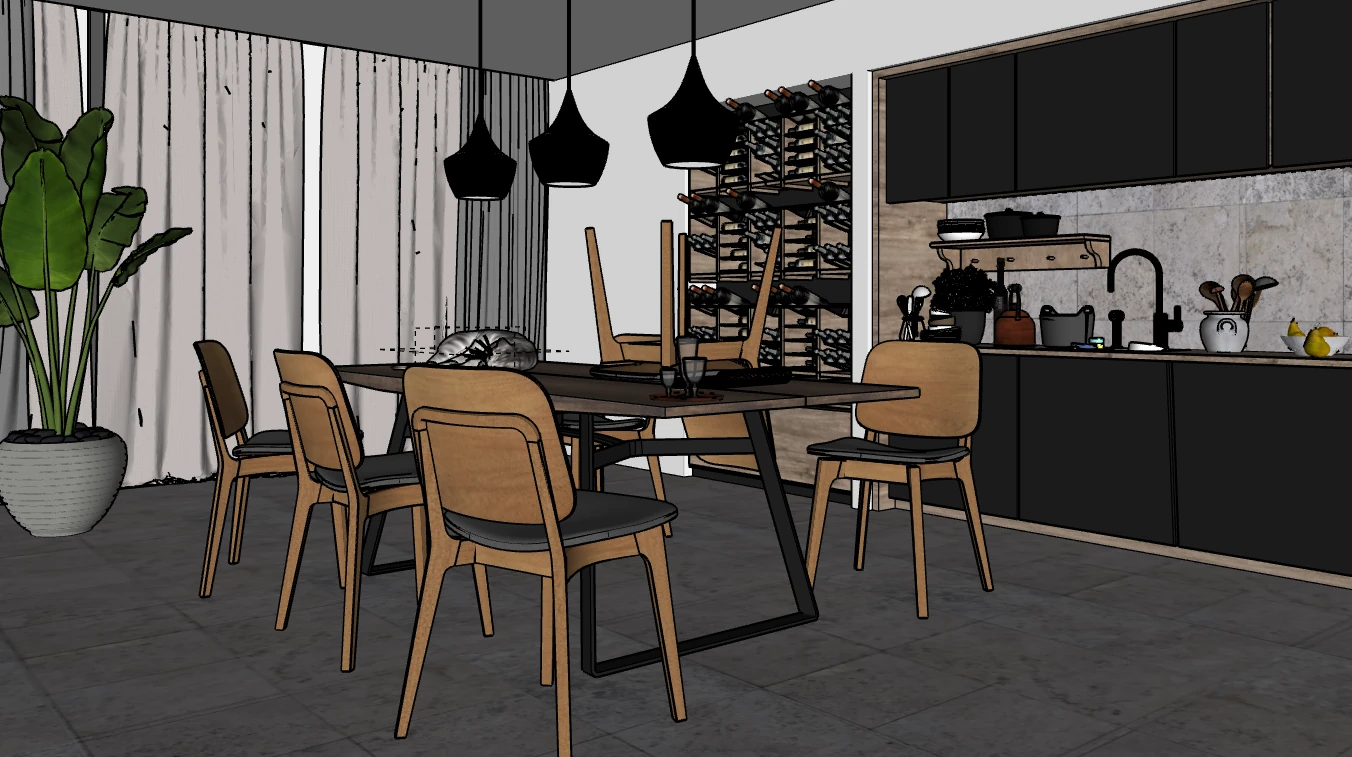
Adjust the camera to enhance the scene. Set the focal length to something between 30mm and 60mm, and frame the elements with intention. Think like a photographer: what do you want the client to notice first?
A good camera angle is the difference between a render that looks amateur and one that looks magazine-worthy.
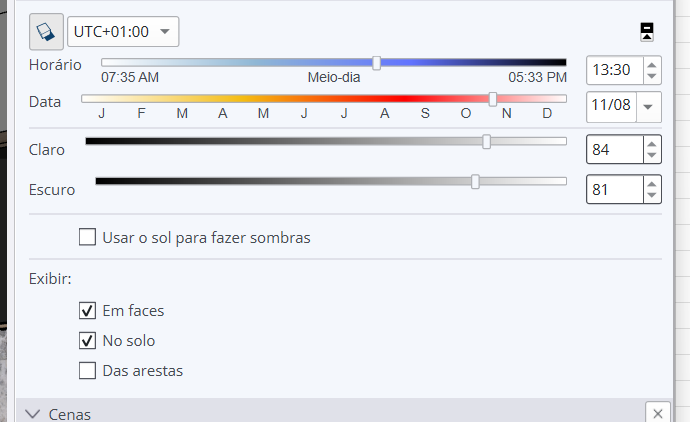
Enable Light & Shadow in SketchUp. Adjust the light and dark sliders for greater scene clarity, leaning the scene toward brighter values. This brings out the textures and helps the AI interpret each material better.
Optional: disable the "On Faces" option under SketchUp lighting.
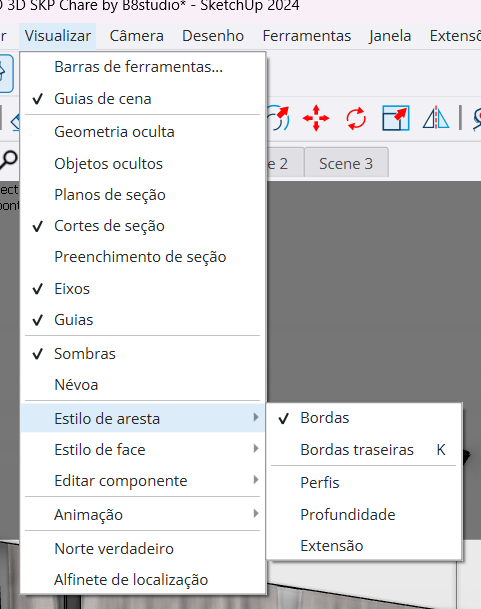
Optional: go to View > Edge Style > disable Profiles. This option can improve texture definition in the scene. Test it in your case to see if it makes a difference.

Optional: go to View > Face Style > enable Ambient Occlusion (SketchUp 2024 or later). This gives the model a much more realistic look and greatly helps scene definition. It may make the project heavier and cause slowdowns, but it is worth enabling when generating the image and disabling afterward.
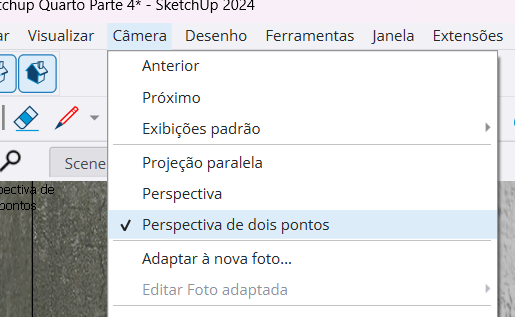
In photography and real life, the vertical lines of a building are never tilted. Follow that standard in your 3D model.
Inside SketchUp, go to Camera > enable Two-Point Perspective. This ensures verticals always stay straight, just like in a professional photograph.
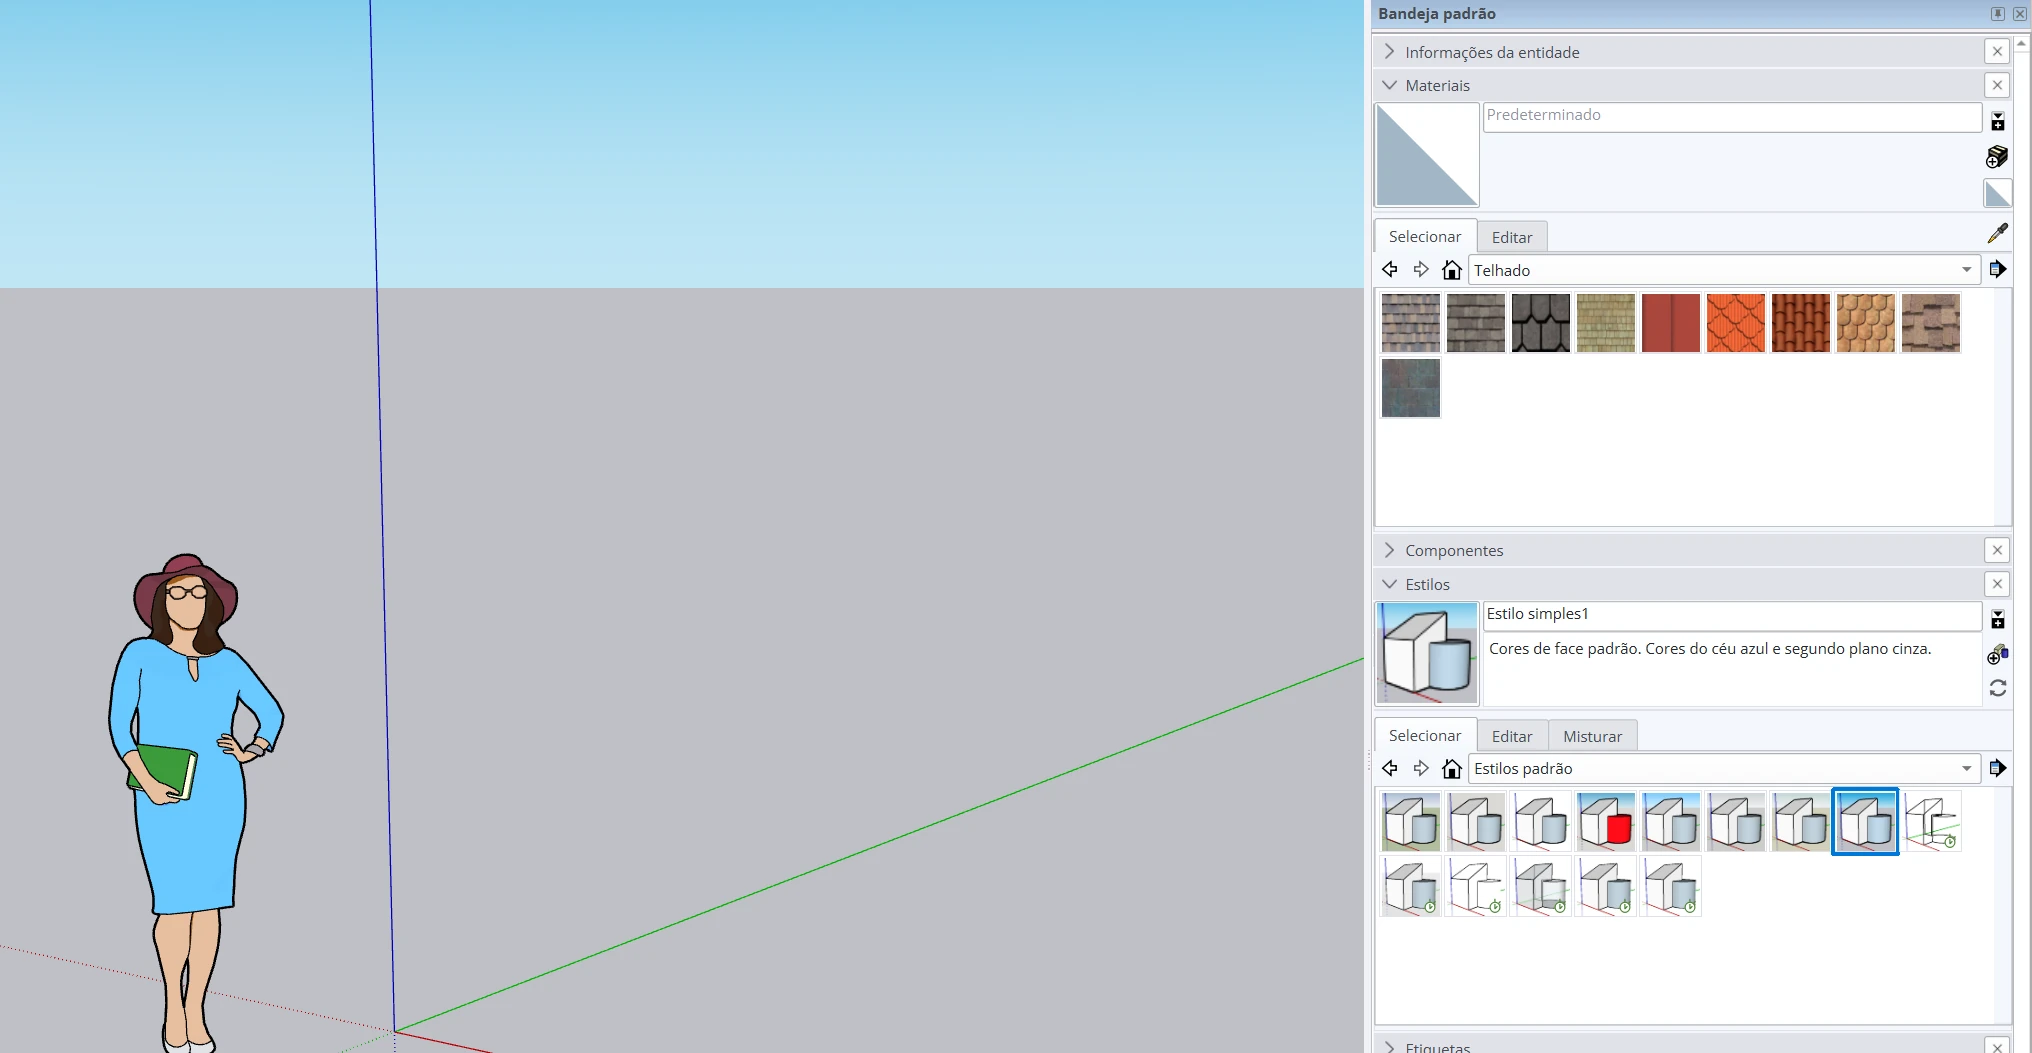
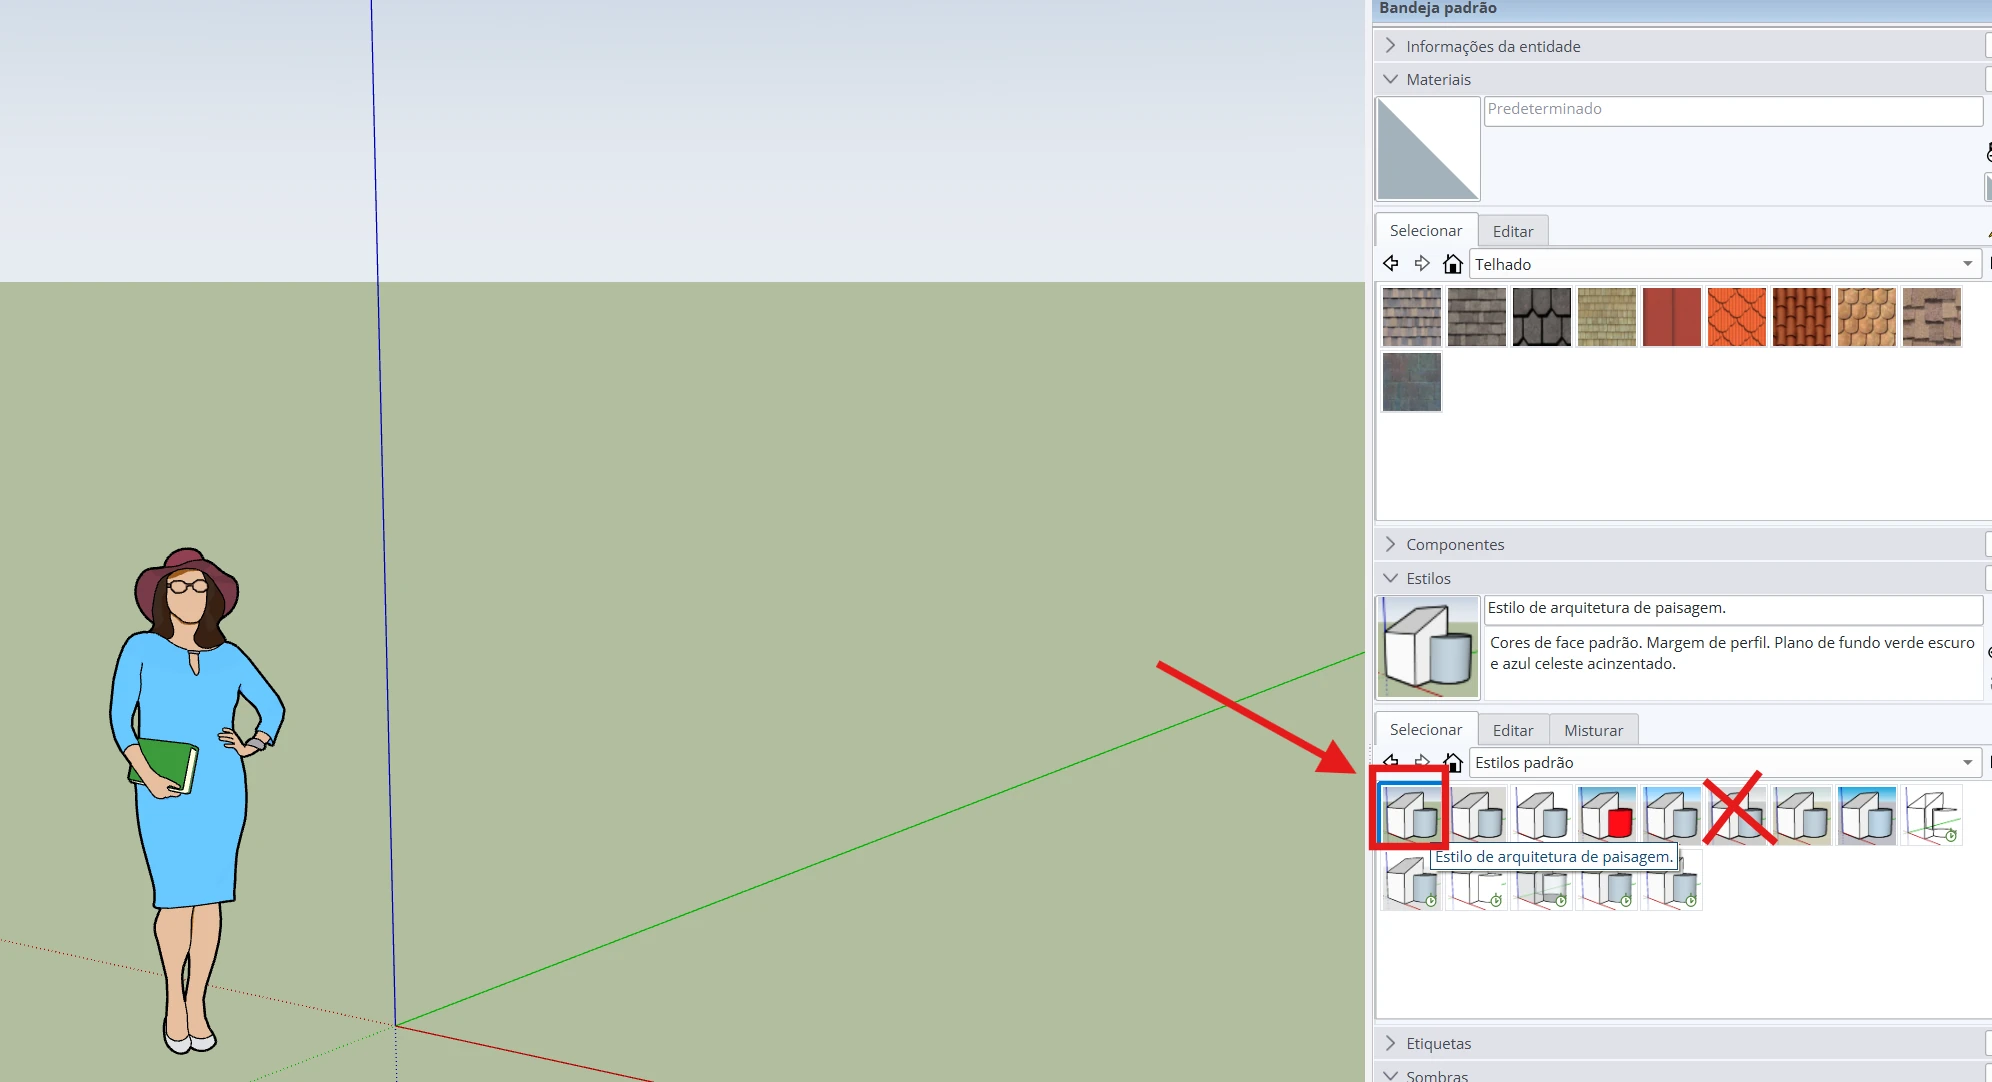
For exterior images, use the Architecture & Landscape style in SketchUp. This adds sky and grass to the scene, giving context that the AI will use in the final render.
Before:
After:
A lot of people ask: if I only have time for one thing, what should I do?
In our tests, the order of impact is:
AI models have advanced a lot and can now better interpret scenes with poor lighting. But quality 3D blocks and correct textures remain the biggest differentiators in AI rendering.
If you could only do one thing, focus on modeling. Invest in courses, good blocks, and quality libraries. And think of the 3D model as input for the AI. If, while modeling, you already consider how the AI will interpret each element, your final render results will be much better.
These tips are practical, but be sure to check out the Redraw YouTube channel, where we publish tutorials focused on helping you render with AI and extract the best results.
Do I need a render plugin to use AI in SketchUp?
No. With Redraw, you take a screenshot of your 3D model directly in SketchUp and upload it to the platform. It works 100% in the browser — no installation required.
Do these tips work only for SketchUp?
No. The logic of optimizing textures, camera angle, and lighting applies to any 3D software: Revit, ArchiCAD, Promob, Blender. The principle is the same.
How long does it take to optimize a 3D model for AI rendering?
It depends on the model, but the optimizations in this guide take between 5 and 15 minutes. It is a small investment that completely changes the result.
Can a simple 3D model produce a good AI render?
Yes, as long as it is well prepared. Correctly scaled textures, clean blocks, and a good camera angle make more of a difference than an ultra-detailed but messy model.
Does AI automatically fix 3D model errors?
Partially. The AI can compensate for poor lighting and add missing elements, but off-scale textures and deformed blocks will compromise the result. The better the input, the better the output.
Create a free Redraw account → redraw.pro
Blog

The AI that transforms how you create architecture, engineering and design projects.