Back to the Blog
How to Render in SketchUp

How to Render in SketchUp

Complete guide on how to render in SketchUp with AI, directly in the browser, without complex plugins or powerful machines.
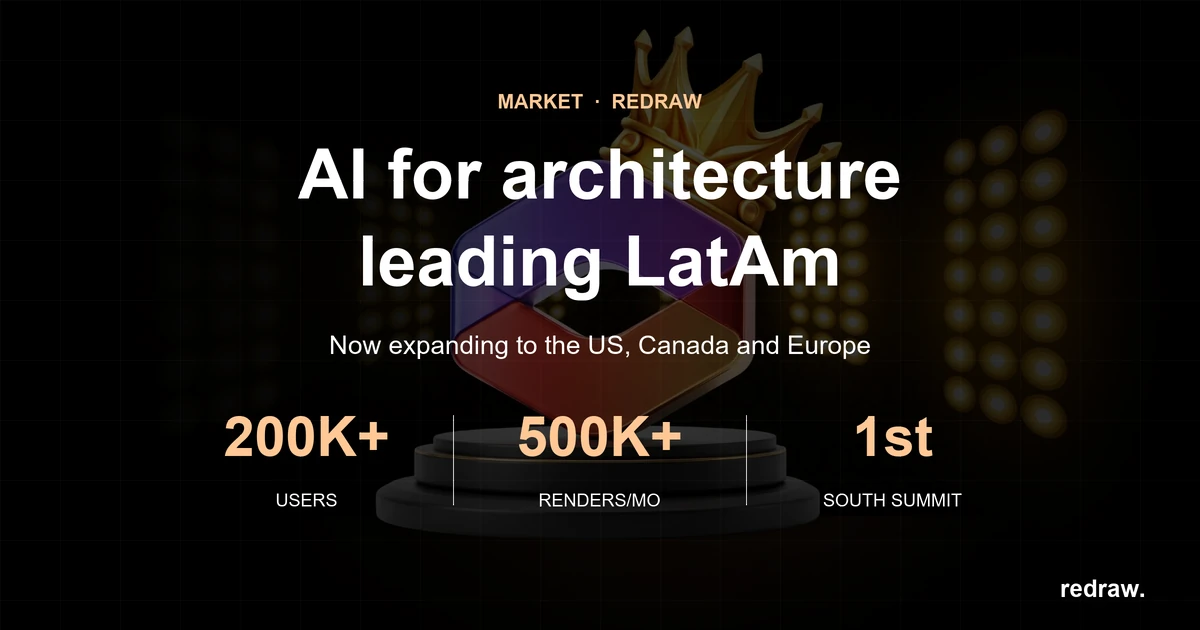
How to Render in SketchUp
Author
Redraw
Administrador
Use AI to delight your customers, sell more, and make your images and videos stand out in ads and marketplaces.
How to Render in SketchUp
6 min
|
18.03.2026
Author
Redraw
Administrador
Use AI to delight your customers, sell more, and make your images and videos stand out in ads and marketplaces.
[

Redraw

]

Create your free account

Start transforming your projects today using Redraw.

I want to register
Share this article

How to render in SketchUp using AI step by step

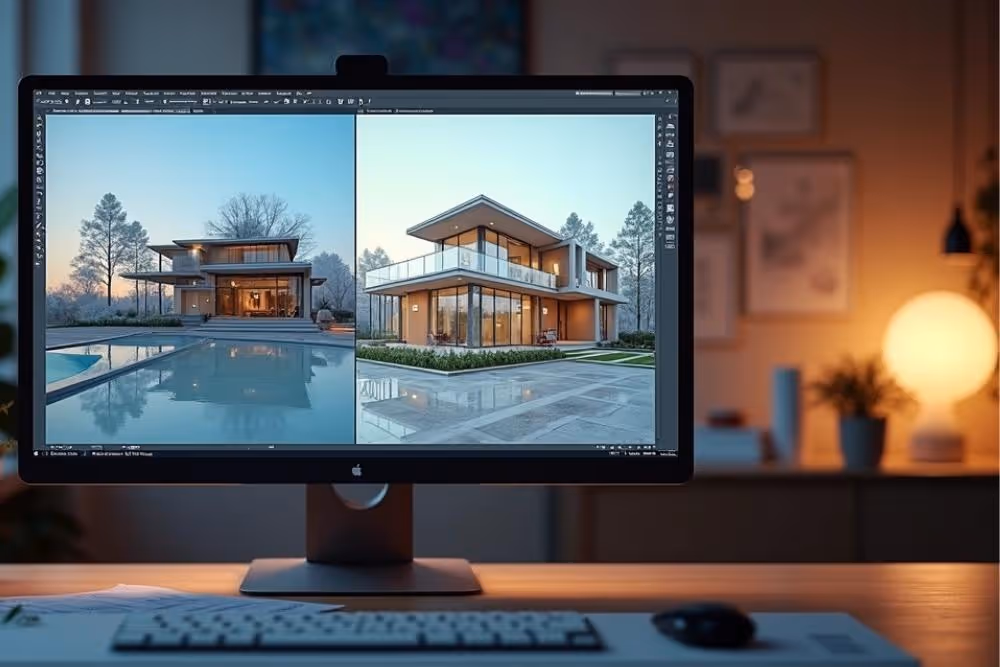
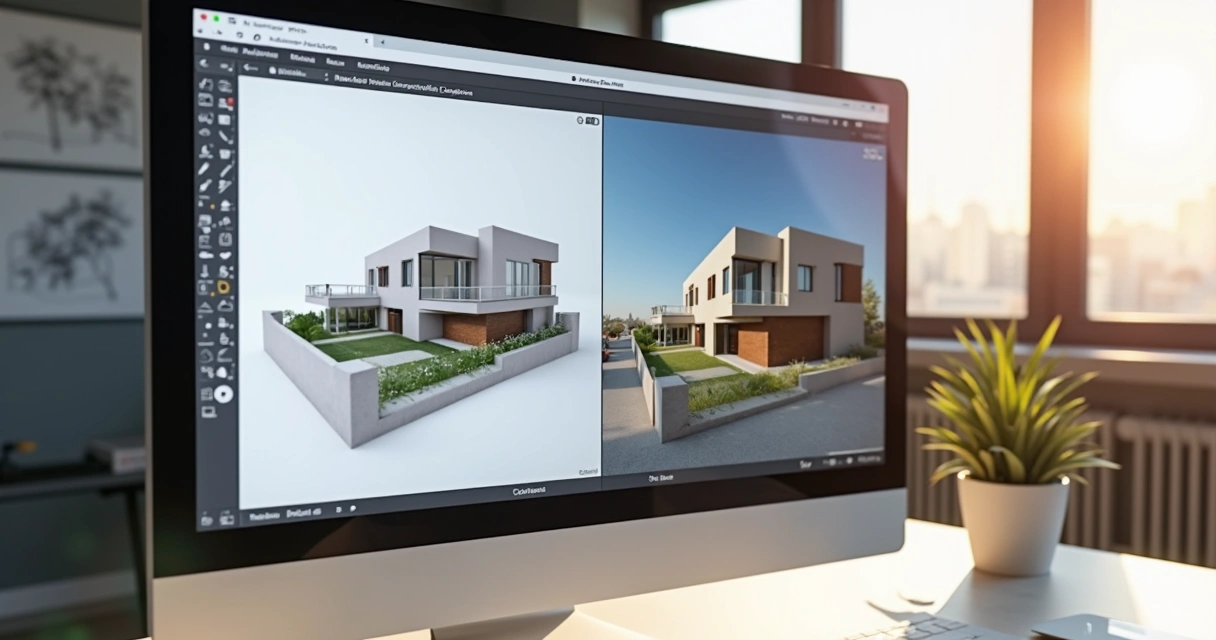
How to render in sketchup has never been so simple or fast. If before it was synonymous with pain, cold sweat and clear nights with the computer almost on fire, now just a few clicks and that's it, an image worthy of “wow” appears. Today you no longer have to pray for the rendering to finish before the coffee runs out. In this article, I show how it is possible to create realistic images directly from SketchUp, from classic methods to the magic of artificial intelligence. And yet, of course, I present solutions such as Redraw, the platform that promises super-fast renderings directly from the browser, without installation, without fuss. Don't you believe it? Take the next steps, test and enjoy, you may never want to know about gigantic plugins again.

If you're looking for practicality, beautiful visual results and plenty of time, you'll want to check out Redraw.

No more struggling to render in SketchUp.

Why learn to render in SketchUp

It even seems like a rhetorical question. But the truth is: more and more of your customers want to see, not just imagine. Showing the project in SketchUp in 3D is impressive, but the difference between a raw model and a realistic rendering is the size of the distance between “ok” and “wow”.

If you've ever found yourself showing off that dull gray model and hearing a “So, is it going to stay that way?” , it's time to go one step further. Mastering rendering means saving time for approval, delighting clients, valuing your portfolio, and saving your team from eternal meetings trying to explain light and texture with words.

  • Your presentation is much more professional.
  • It helps the client to understand real space and materials.
  • Avoid rework and discussions in detail: everyone sees it the same way.
  • Generate images for marketing, portfolio, or even for a contest.

Learning how to generate realistic images in SketchUp is no longer a fresh thing. It became a work tool even for those who were never a fan of technology.

Preparing your model in SketchUp

The story of good rendering begins within SketchUp, before any export or use of AI. If the 3D model is messy, full of inverted surfaces and “lost” faces, the final result will be doubtful to say the least. And nobody wants to be embarrassed (or at least, I don't want to).

Organizing and cleaning the model

  • Well-used layers/labels: Separate floors, walls, furniture, lights into groups/layers.
  • Groups and components: Never leave everything loose! Everything that is repeated, becomes a component.
  • Clean geometries: Erase extra lines and faces, avoid leaks and overlays.
  • Aligned normals: Check that the white faces are sticking out. Inverted faces give bizarre light effects.
  • Mapped textures: Never throw away the texture anyway. Poor mapping = walls that are stretched or confused in the rendering.

That's that annoying detail that nobody likes to waste time on, but that saves lives down the road.

Scene and camera settings to render with SketchUp

Before you exit by clicking “render”, think:

  • What is the best angle to tell the story of your project?
  • Will it need cuts, internal views, external views, detailing?

Define scenes in SketchUp, make adjustments to Field of View, adjust camera height. Render loves it when you put in a little extra effort at this stage.

A clean template does half the rendering on its own.

Como Renderizar no SketchUp

Tools for rendering in SketchUp

If a well-done project is half the way, choosing the rendering tool is the other half. Here, the need is in charge: someone may only need a preview, another wants something almost indistinguishable from a photo.

Native tools without a plugin

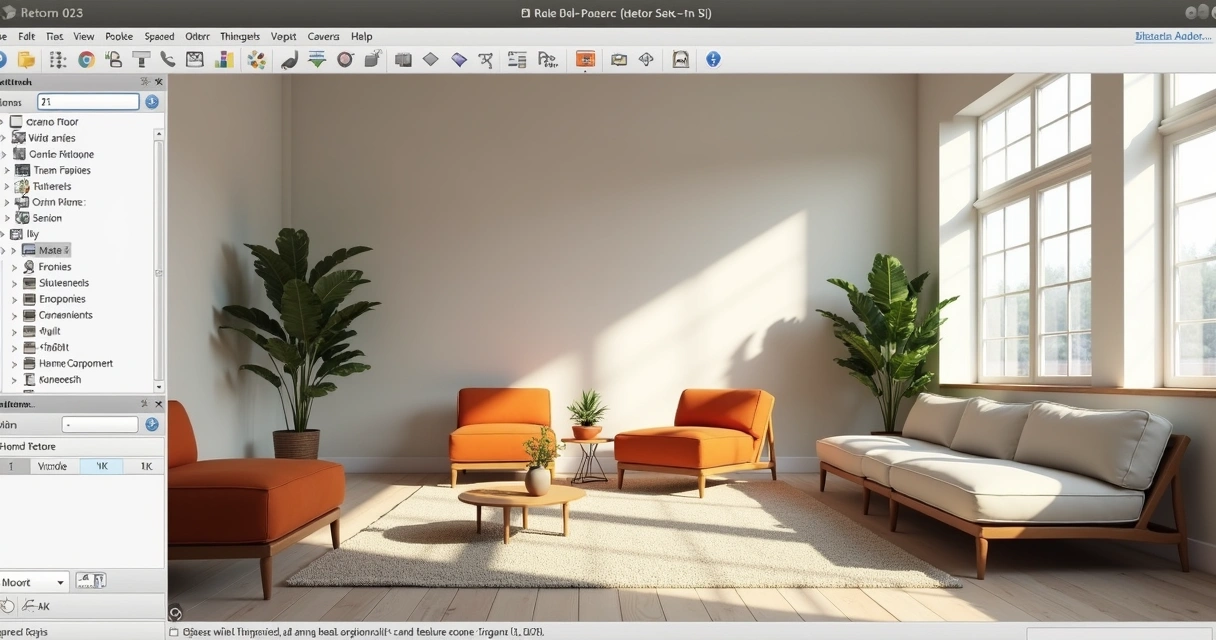
Yes, some people still ask: “Doesn't SketchUp alone make a realistic rendering?” Well, the program even exports images in PNG or JPEG using the Export command, but the most you can get are shadows, stylized styles, and some cuter lines.

The look is interesting for digital sketches or quick presentations. But if the idea is to show finish, floor shine and glass reflection, you will need something beyond the basics.

  • Standard image export: limited quality
  • SketchUp styles: filters, artistic lines
  • SketchUp shadows: only simulate outdoor lighting, there are no realistic effects

Conclusion: Native is only suitable for quick presentations or artistic sketches.

Traditional plugins

Here begins that game “the more, the better or does it just complicate?”. There are several famous plugins integrated with SketchUp, with advanced controls for materials, lights, cameras, and special effects.

  • Plugins offer detailed control of reflection, material, exposure, and even post-production effects.
  • Good for those who prefer to adjust every detail and have time to learn endless configuration curves.
  • They usually consume powerful computer resources; ideally, have a machine with a dedicated video card.

But for many, the nightmare is real: extensive menus, options that even programmers miss, and time-consuming renderings that steal quality of life. Then a question arises: isn't there a simpler path?

AI tools (Redraw + comparison with alternatives)

Until recently, high-quality rendering was a mix of art, patience, and hardware. With AI, the story changed: just export the model (or even a sketch!) , send it to the cloud and let the server work for you.

Redraw enter this scenario as an option for architects, designers, engineers, companies and even those who are just starting out. One of the differentials? Renders finished in seconds, right in the browser, with the right to transform simple drawings into realistic images or animated videos.

  • No plugin installation required: it works 100% via the web
  • Fits any computer, even a notebook without a powerful graphics card
  • The processing is done in the cloud, so you continue using the PC normally while the render “sprouts” out of nowhere
  • Send the file, set the options and only receive the result, as easy as that
  • Better: already more than 2 thousand Brazilian professionals use it on a daily basis

And if rendering became “clicked, quit”, why complicate it more?

Look to the future: let AI suffer for you.

Como Renderizar no SketchUp

How to render in SketchUp without plugins

You can breathe a sigh of relief: yes, you can generate incredible images without installing any plugin. “How like that?” , simple, using online solutions, such as Redraw, that dispense with the old list of hardware requirements and versions of SketchUp. The flow is simpler than it seems:

  1. Finalize your model and save it in a compatible format (normally SKP or export as a high-resolution image, if it's a sketch or sketch done by hand).
  2. Access an online platform (Redraw is there showing how it works, by the way).
  3. Access the file upload function, upload your template or image.
  4. Choose the type of rendering you want (realistic, stylized, with natural lighting, etc.).
  5. Click on render and wait a few seconds. That's right, seconds.
  6. Download the finished image and use it however you want: client presentation, portfolio, publication, video.

This process is great for those who:

  • You can't or don't want to install anything
  • Are you in a hurry?
  • You're still learning detailed adjustments to classic plugins
  • Do you want a quick solution for intermediate steps or final versions?

Less time setting up, more time presenting.

Optimal lighting, textures, and settings

You may have noticed that the difference between a rendering that seems to have been made in 2005 and another that is impressive is in the details: light, materials, texture and camera angle.

Correct lighting makes all the difference

  • Always prefer natural light (sun and sky) to add volume to the rooms
  • Avoid excess lighting, unless it's part of the concept
  • Adjust the intensity and color of the light So as not to pop white or leave everything “erased”
  • Position the camera so that light enters from the side, not from the front, to create soft shadow and depth

IA knows how to work with light, but it helps a lot when you already orient the scene in the right way.

Textures and materials: less is more

  • Choose high-resolution texture images (wood, stone, concrete, etc.)
  • Keep the scale realistic. A huge wood on the wall totally undermines the credibility of the result
  • Use reflection and shine (glossiness) only where it makes sense: metals, glass, polished surfaces
  • Walls, plaster and matte surfaces look better without strong reflection

Final settings

  • Set the output image resolution with your usage in mind: 1920x1080 for regular presentations, 4K or more for portfolio or print
  • Plan the framework: centralize the focus on the environments or products that matter most
  • If possible, play with depth of field, which generates that taste of a real photo

Just what's necessary: light, texture, angle and... it's over.

Average time and tips for speeding up rendering

Now we come to that controversial point: “How long does it take to render in SketchUp?”. Honestly, it depends. With classic plugins, it can range from minutes to hours, especially if the configuration isn't perfect. But I can say, with Redraw-like AI, it is possible to receive ready images in seconds or at most a few minutes, even for large projects.

Tips to speed up your rendering:

  • Simplify the model: clear geometries that don't appear in the scene
  • Lower resolution for quick tests only, increase in the final version
  • Avoid mirrors and reflective surfaces too much (stress any rendering engine)
  • Use cloud platforms whenever possible. A gain of time and peace.

Finally, develop a workflow: model, make the first quick render, adjust light and materials, refine, only render high in the last step. Avoid wasting time and patience.

Smart rendering is a life saver.

Frequently Asked Questions

What is rendering in SketchUp?

Rendering in SketchUp is the process of generating realistic images from the 3D model made in the program itself. The model, which is normally simple and “dry”, is simulated with light, shadow, texture, and materials to appear as a real photo of the built project. There are methods with plugins, manual export and new AI options, as provided by Redraw, that make everything more practical.

How do I render a project?

You can render a project in several ways: using plugins attached to SketchUp that allow detailed adjustments of light, materials and camera; exporting images from SketchUp itself (quite limited); or using artificial intelligence platforms, such as Redraw, where you just have to send the model file and receive the render in a few clicks. The important thing is to always clean your model beforehand to avoid problems.

What rendering plugins are recommended?

Traditional rendering plugins work well for those who like to customize everything, but they can be cumbersome and require a powerful computer. Modern and fast alternatives include cloud-based tools with AI, such as Redraw, which offers simple rendering with no installation required. The ideal is to try the options and see which one best fits your workflow and type of project.

Is rendering in SketchUp free?

The simplest rendering, via direct image export from SketchUp, is free but limited, does not generate realistic images, only improved sketches. Paid plugins and AI platforms, such as Redraw, offer plans with advanced features, but they generally allow initial tests or affordable plans. It is worth considering that saving time usually compensates for any investment.

How to improve render quality?

The secret to quality rendering lies in three pillars: well-organized model (without lost geometries or inverted faces), careful choice of textures and materials (high resolution, correct scale) and lighting designed from SketchUp. Modern AI platforms, such as Redraw, already make it a lot easier, but no magic works miracles with a bad model. Make every effort to prepare, choose the right platform, and the rest is a matter of final adjustments.

Transform your rendering experience in SketchUp

Now that you've discovered how to render in SketchUp in an easy and pleasurable way with the help of artificial intelligence, such as that offered by Redraw, you won't have to settle for less. Instead of wasting precious hours struggling with complicated plugins and complex configurations, choose a solution that's fast, efficient, and fully aligned with 21st century needs.

Sometimes the only thing you need is a simple click. Or a cloud platform that works for you. Or maybe just a little bit of courage to try something new. Don't just stick to theory: try Redraw, see your project come to life in a matter of seconds and join thousands of professionals who have already left the challenges of rendering behind them.

The future of rendering is now at your fingertips, directly from your browser.

Now it's your turn: do you want to visualize your idea transformed into a realistic image? Get to know Redraw, impress your customers, and take your time to create more and explain less.

Share this article
Summary of the content
[

Blog

]

Related articles

Access Blog
chatgpt arquitetura
Redraw
10.04.2026

ChatGPT in Architecture

Redraw
5 min of reading

The Future of Architecture: The ChatGPT Revolution

ChatGPT architecture has never made more sense to Brazilian architects than it does now. From a futuristic conversation to happy hour, it became an office routine, after Redraw integrated the GPT-4 intelligence directly into its platform. As a result, professionals who previously spent hours explaining ideas to interns, designers, or slow software discovered that it was enough to type “brutalist façade with vertical stripes” in the chat, wait 30 seconds, and see the hyper-realistic rendering appear from Nought on the screen. All this without installing plugins or messing with super-powerful computers. It's no exaggeration: this integration created the first conversational AI ecosystem with instant rendering in the country, changing the workflow, and even the mood, of those who live by delivering visuals.

ChatGPT architecture: how integration with Redraw changed everything

The integration between ChatGPT and Redraw created a turning point that is still being digested by many professionals in Brazil. Before, to transform a briefing into realistic images, architects had to jump between tools, adjust a thousand settings and, almost always, face technical frustrations.

With ChatGPT within Redraw, this process was reduced to a few clicks and some well-formulated sentences.

Do you want to know how it works in practice?

  • Create concept: in the integrated chat, describe what you need, for example, “60m² apartment, open concept, earthy tones and large window”.
  • Adjust: refine the request with automatic questions or suggestions from ChatGPT itself.
  • Preview: click “render” and wait. The result appears on the screen in up to 30 seconds.
  • Feedback: Ask for variations, add technical details, or generate alternative perspectives, without leaving the same page.

This “superpower” is in the hands of more than 80,000 active users, who already understand the value of saving up to 90% of the time on renderings and concept tests.

What is ChatGPT and how it revolutionizes architectural projects

ChatGPT is a language model trained to understand, generate and dialogue on almost any topic, including architecture. Its version based on GPT-4 overcomes the text-to-text barrier. It interprets a briefing and already solutions, standards, styles, and even estimates of area or lighting. And when integrated with Redraw, it becomes an “instant translator” between technical words and photorealistic images.

Gpt-4: The Brain Behind the Change

The latest generation of the model, the GPT-4, understands complex contexts, knows how to differentiate rendering from a volumetric model, and recognizes specific terms (such as “vertical brise”, “double ceiling height” or “vegetation density on the edge of an urban lot”). Thus, he responds like a senior architect, without trying to guess the client's taste, but basing the answers on Brazilian trends, standards, and references.

Why Brazilian architects choose chatgpt

According to Redraw's internal analysis, professionals are looking for architectural ChatGPT to gain speed and centralize workflow. Integration saves time, reduces rework, streamlines concept approval, and gets repetitive tasks out of the way. Brazilians like “all in one”, and the alternative of creating rendering directly from the browser, without investing in expensive hardware, makes a difference for small and medium-sized offices.

Differences between free and integrated ChatGPT

Many have already tried the free version of ChatGPT on the web. But without native integration with a visual platform, the chat is limited to generating texts and references. The difference between Redraw is that it transforms responses into rendered images, eliminating copies and pastes between applications. It's literally a leap from conversation to the final visual, without losing information along the way.

Which AI does a complete architectural project?

This question appears almost every day in groups of architects. With TCCs, commercial proposals and increasingly demanding clients, the desire to automate processes increases, but few know what to trust.

ChatGPT vs other visual IAs: the real comparison

While other intelligence creates loose images based on artistic prompts, ChatGPT, integrated with Redraw, goes further. It understands context, generates aligned text and image (without distortions or headless results), and complies with Brazilian technical guidelines. The secret lies in the conversation of “remembering” the office pattern, the palette, the use of space, and even the client's preference, something that no isolated visual AI can deliver.

Why integration matters more than isolated AI

AI alone generates beautiful results that are disconnected from the actual design process. The integration, on the other hand, allows for more precise commands, continuous context, and automatic sequences that speed up briefing to visualization. It's the difference between ordering a pizza on the phone and having an automatic kitchen, adjusting the flavor according to your diet.

Redraw + ChatGPT: the Brazilian response

Speaking of a national reality, only the Redraw + ChatGPT union was built on the step by step of Brazilian flows, with support in Portuguese and price in real. The result is a 100% cloud engine, adapted to render both 30m² apartments in São Paulo and 500m² homes in Santa Catarina, from sketch to rendering, everything goes through the chat. See more behind the scenes of this technology in details on how Redraw works.

How to use ChatGPT to create projects with Redraw

Now for the practical part. If someone has already logged in, they will notice that Redraw's integrated environment allows instant access to ChatGPT. You don't have to download anything. Just open the project, click on the chat tab, choose the GPT-4 model, and start the dialogue:

Step 1: accessing ChatGPT within Redraw

Once logged in, the user clicks on the desired project and opens the side chat window. The integration recognizes project settings, imports data from SketchUp/Revit, and suggests intelligent questions, such as “Do you want a more Scandinavian look?” or “What is the solar orientation of the environment?”

Step 2: from briefing to concept in seconds

The architect writes clear sentences about the objective (“commercial room, 3.5m ceiling height, natural lighting, clean style”). ChatGPT responds with a conceptual proposal, material references, and already suggests layout and detailing options. The user can adjust, ask “What if I enlarge the window?”

Step 3: Transforming text into photorealistic rendering

Just click “render”. The Redraw cloud processes the order and, in about 30 seconds, delivers the renders with magazine catalog quality, including lighting, textures, and even automatic setting.

Render 3D sala de estar após prompt arquitetônico

How to ask ChatGPT to do an architectural project

Asking for a project for AI requires a bit of malice. The secret lies in the prompt, that is, in the command that translates all your architectural reasoning into digital instruction.

Anatomy of the Perfect Prompt for Architecture

Good Prompt has:

  • Description of the environment or typology (“single-storey house, 120m²”).
  • Desired style (“industrial, exposed concrete”).
  • Technical requirements (“cross lighting, natural ventilation”).
  • Palette of preferred colors and materials.
  • Detailed function (“master suite with closet, integrated kitchen”).

The more precise and objective, the faster and more faithful the ChatGPT result integrated with Redraw will be.

Practical examples that work with Redraw

  • “I want a 40m² loft with industrial style, exposed brick, metallic mezzanine and lots of natural light.”
  • “Compact apartment, 30m², neutral palette, planned furniture and small balcony.”
  • “Corporate room for startups, flexible furniture, green wall and dimmable lighting.”
The result appears within 30 seconds, ready for approval or adjustment.

Other prompts inspirations can be found at Advanced content about applied AI in projects.

Common Mistakes and How to Avoid Them

  • Being too generic (“pretty house”, “modern room”).
  • Ask for incompatible elements (e.g., “glass walls in southern Brazil without thermal protection”).
  • Do not review the text and create contradictory prompts (“sober but very colorful palette”).

Just review before submitting, prioritizing clarity and technical consistency.

Templates ready for different projects

  • Residential: “Single storey house, 150m², 3 bedrooms, living room/kitchen integration, façade with cobogós, sandy tones, front garden.”
  • Commercial: “Clothing store, large window, vertical exposure, white walls, and steerable lighting rails.”
  • Institutional: “Children's school, colorful environments, low furniture, covered patio, lots of diffused lighting.”
  • Landscaping: “Tropical garden, native species, low lighting, stone paths and shaded rest area.”

The ChatGPT architecture integrated with Redraw

The secret of the Redraw experience lies in the integration architecture. Opened via API to GPT-4, the system connects chat responses directly with the cloud rendering engine, forming a continuous cycle between conversation and visual result.

How does technical integration work

The user doesn't see it, but the platform automatically translates the textual briefing into parametric commands sent to the rendering engine, while keeping the conversation open for refinement. This allows you to receive instant visual feedback without giving up technical dialogue.

Cloud processing: your notebook thanks you

100% cloud processing eliminates the need for expensive video cards or local servers. The generated file can be downloaded, adjusted, or sent to clients in less than 1 minute.

From idea to render in 4 automated steps

  • Prompt entry into the chat.
  • Contextual interpretation by AI.
  • Sending the parameters to the rendering engine.
  • Receipt of the ready render, already in the active project.

Security and Intellectual Property

All submitted and rendered projects are under user control, with automatic backup and restricted access via secure login. Redraw doesn't use project data to train independent AI models, keeping intellectual property protected.

Arquitetos trabalham com IA em escritório moderno

Complete workflow: ChatGPT + Sketchup + Redraw

The process integrated with SketchUp or Revit does not require digital juggling. The base project is normally created in these tools, exported to Redraw, and that's where the magic continues.

Importing basic 3d models

The platform accepts SKP, RVT, and DWG files. Just import and choose whether you prefer to start with the basic volume or activate the chat for details.

Enriching with intelligent prompts

The user can ask for more details, “add pergola to the porch”, “insert hidden LED lighting”, “change facade color to dark blue”.

Generating instant variations

Tired of the result? Request changes to the chat and receive other material, texture, layout, and lighting options in a few seconds. This eliminates time-consuming drafting and speeds up approvals with customers.

Refinement with Conversational AI

The best part: you don't have to start from scratch with every change. The AI understands the context, history of the project and adjusts only what is necessary. The work flows, without that feeling of “fighting” with the software.

Learn more about integration with design software at Article about interior design with AI.

Real Results: Architects Using ChatGPT with Redraw

Numbers speak louder than creative slogans. And in the case of Redraw with ChatGPT, KPIs excite even construction managers.

Reduction from 48h to 30min in renders

Before the integration, renders took two days between briefing, file exchange, adjustments, and export. Now, real projects report final delivery in less than half an hour, with three or more options ready for the customer to approve the same day.

Proven ROI in Brazilian offices

Architect Juliana Silva, from Belo Horizonte, says: “By saving time and cutting expenses with a render farm, we were able to increase the number of projects completed in 2024.” Other data collected in internal research show a reduction of up to 70% in operating costs in small offices that migrated to the 100% cloud flow.

Testimonials from integration users

“When the customer ordered 12 facade variations, I thought it would be a wasted weekend. With the Redraw chat, I delivered everything in 1h30.”
“AI even helped me find solutions that my team hadn't thought of.”

These testimonials are published directly on Redraw's real case channel.

The 4 types of architecture powered by ChatGPT

Integrated AI doesn't live in residential areas alone. Four segments stand out in the professional use of ChatGPT combined with Redraw:

Residential: from the floor plan to the virtual tour

From the creation of the layout, definition of finishes to a 360° digital tour, ChatGPT interprets the needs of the Brazilian house, natural light, integration, ventilation, and real solutions for the climate and the national pocket.

Commercial: Presentations That Sell

Store, restaurant, office? The chat generates images with an emphasis on the product, flow of people, ergonomics, and already suggests techniques for displaying brands or exploiting a façade.

Institutional: Norms and Creativity

School projects, clinics and public offices are automated in compliance with ABNT standards, accessibility, and environmental comfort requirements. All with suggestions of colors and furniture adapted to the purpose of the building.

Landscape design: nature rendered with AI

Prompt: “rain garden for urban lot, native species and recycled wood bench”. The result is instantaneous: the rendering shows vegetation, shadows and paths according to the city's biome, editable in the chat.

To learn how AI and landscape design move forward together, see tips at AI projects article.

Frequently asked questions about ChatGPT in architecture

What is ChatGPT in architecture?

It is the application of GPT-4 conversational intelligence to transform technical briefings, ideas and requests from architects into objective answers, ready-made concepts, regulations and, with Redraw, even instantly rendered images. ChatGPT understands architectural language and translates instructions into practical flows without intermediaries.

How to use ChatGPT in architectural projects?

The most practical way is through integration with platforms such as Redraw. The professional accesses a chat, describes the project requirements, style, area, materials, standard, receives suggestions and can generate 3D images or renders with just one click. There is no need to program or install new software on the computer.

What are the benefits of ChatGPT for architects?

Architects gain agility, centralize information, reduce rework, and generate photorealistic visualizations based on simple text commands. The integrated use eliminates noise between the “desired” and the “executed”, optimizes costs and allows presenting varied options to the customer without increasing the workload.

Does ChatGPT replace architecture professionals?

No. ChatGPT in architecture is a support tool, and the architect's talent and critical eye are still irreplaceable. The AI takes care of the repetitive and conversational phase, while the professional is dedicated to the concept, detail, and human relations of the project.

What architectural tasks can be automated?

With ChatGPT combined with Redraw, it is possible to automate:

  • Generation of proposals and conceptual alternatives
  • Photorealistic rendering
  • Review of standards and accessibility
  • Choice of palettes, materials and furniture
  • Standardized documentation and technical captions

Thus, AI frees up time for the architect to focus on creativity, service, and personalized solutions for each client.

Conclusion: the future has arrived with integrated ChatGPT and Redraw

What seemed like fiction a little while ago has become routine in the most attentive offices in Brazil. Use chatgpt architecture integrated with Redraw It is to deliver more, with a better look and less wear.

The invitation remains: take the test and personally see the transformation in your creative process, without depending on expensive hardware, without losing technical control, and with support in Portuguese and prices in real. The future of projects is just a prompt away. Try it and be surprised.

Redraw
18.03.2026

Architecture Moodboard

Redraw
5 min of reading

What is an Architecture Moodboard and Why Is It Essential?

Moodboard architecture: the digital drawing board that will revolutionize your projects. If you still associate the creation of inspirational panels with magazine clippings and glue sticks, get ready to discover a universe of possibilities that goes far beyond craftsmanship. Using reference panels to present ideas and concepts is nothing new, but the way in which this happens today goes hand in hand with surprising visual aids, high-level software and, of course, artificial intelligence. Do you want to convince a customer quickly? Do you need to align your team so you don't run the risk of everyone imagining the project with a different aesthetic? Well, come with me because moodboarding is your new best friend.

Think of the moodboard as the visual translation of the central idea of an architectural project. It serves to communicate, align expectations and, above all, awaken emotions. Colors, textures, materials, furniture, landscapes, architectural details: everything can be there, gathered in a single framework that is more efficient than many powerpoints or long meetings. Perhaps you have experienced the disappointment of presenting a project, thinking that it was clear and, in the end, realizing that the client saw something completely different. The moodboard exists to avoid this type of misunderstanding, saving time, energy, and, if you're foolish, even a few tears.

Transform loose ideas into irresistible inspirations.

In addition to translating concepts, the moodboard gathers information that guides the entire design process. It is that visual summary that helps with decision-making, making it easier to select finishes, organize colors, or even think about the sensations that the environment should convey. Today, those who present a moodboard are seen as someone prepared, aware and, honestly, much more likely to close the deal. What customer doesn't like to feel special receiving a sensory preview of the future space?

And if you think that the only function of the moodboard is to delight the customer, you are mistaken. It also serves as a compass for the execution of the project, helping the entire team to row in the same direction. It doesn't matter if you work alone, with a duo, or in a busy office: visual clarity saves you from discussions, boring alignments, and unnecessary revisions.

In short? Architectural moodboard is the bridge between inspiration and result. And you don't want to see that bridge fall, do you?

Now, let's find out how to turn a bunch of loose references into a breathtaking panel.

Tools and software to create incredible architectural moodboards

If in the past we had to fight with glue, paper and images from magazines, today that suffering has become almost an urban legend. Digital resources allow you to create moodboards that are much more beautiful, dynamic and easy to edit. Choosing the right tool will save time and triple the impact of your presentations.

Redraw: rendering software

Do you want to go beyond static montages? I present Redraw, a platform that is changing the logic of visual development in architecture. It uses artificial intelligence to 3D rendering, improve images and transform simple sketches into hyper-realistic scenes. The difference here is flexibility: you can create and adjust moodboards in your own browser, without relying on powerful machines or complicated installations. Redraw allows you to select references, test visual styles, and quickly visualize how your favorite elements would be inserted in the project proposal. All of this considerably reduces the time between the concept and that image that makes the customer say “Wow!” without blinking.

Moodboard arquitetura

Online tools

If you need additional resources or want to make a more traditional panel, there are several practical and intuitive options. Image editing programs allow you to quickly organize references, play with overlays, include labels, and even integrate short videos or animated GIFs (this is a trend, you can take note). The dynamic here is simple: drag, drop, adjust sizes and create compositions that combine technical information with a lot of inspiration. Don't forget to maintain the quality of the images. Pixelated moodboard conquers no one.

Bonus tip: invest in tools that allow you to collaborate in real time, especially if you work as a team or like to involve the client in the creative process.

Step by step: how to create an architectural moodboard that impresses

Making a killer moodboard is not a matter of artistic gift. The secret lies in the processes. I'm going to show you a simple itinerary, one that makes life easier even for those who swear they're not very familiar with graphic design.

Define the concept and style of the project

Before throwing images onto a screen, ask yourself: what feeling should space convey? Is it cozy? Sophistication? Urban inspiration? The concept is the “common thread” and even the moodboard can sense if you skip this step. Bring together keywords, ideas, and even sensations. Write it down on a sheet of paper. This will serve as a filter to select the best elements. And don't be afraid to be bold in references. A couture dress, a piece of art, or a traveling landscape may have everything to do with that client's country house.

Collect high-quality images and references

Hunt time! Spend some time digging up photos, textures, material maps, and even small illustrations. Be careful not to just copy someone else's projects. Think about details that really connect with what you intend to create. Image sites, free banks, own photographs, catalogs and, of course, the renderings generated by platforms such as Redraw, are inexhaustible sources.

Bad, blurry, or low-resolution images devalue the moodboard.

  • Look for proportion in the photos
  • Avoid going overboard with filters
  • Prefer real images to excessive use of mockups
  • Include physical samples (taken from photos) whenever possible, such as fabrics or stones

Arrange the elements in a harmonic way

The time has come to orchestrate everything on the panel. See the moodboard as a visual narrative. Don't just throw everything together and hope it makes sense. Attention to color balance, the proportion between textures, and the hierarchy of the elements.

Visual balance is the secret of elegant moodboarding.

Assemble the main images first. Then fill in with small references, quick notes, color palettes, small sketches, or furniture details. Don't want to embrace the world: you have to let your eyes breathe. Separate space between images and maintain a pattern. You can bet on geometric shapes, lines and subtle overlays to add a personal touch. If you were in doubt about the result, move away from the screen a bit and see if the panel tells the story of the project without needing many words. If you need to, ask for someone else's opinion. Sometimes an outside look reveals what was lost in the excess of references.

Moodboard arquitetura

Common mistakes when creating architectural moodboards (and how to avoid them)

Mistakes happen, but some slip-ups can compromise even the best of rendered projects. Here is an honest list of the most common failures in assembling architectural reference panels:

  • Excessive reference and visual confusion: Overcrowded panels tire and lose impact. Focus on quality, not quantity.
  • Misalignment with the initial concept: Select only what really speaks to the purpose of the project, avoid references just because they are in fashion.
  • Low-resolution images: Pixelation is not a trend. Only use sharp photos with good lighting.
  • Reading difficulty: Leave space between elements and don't clutter up the text panel. Moodboard is not a liquidation poster.
  • Lack of consistent palette: Exaggerated color contrasts end up leaving everything polluted. Choose a central palette and stay true to it.

Avoiding these mistakes is half the way to creating an impactful and professional presentation. An extra tip? Invest in a reliable tool that provides flexibility for quick adjustments. Even because there is always that customer who loves to change everything the day before.

FAQ: Frequently asked questions about architectural moodboard

What is the difference between a moodboard and a semantic panel?

The moodboard presents visual, sensory, and aesthetic references, mixing images of environments, materials, colors, art, and objects, all designed to create an atmosphere or convey a general feeling. The semantic panel, on the other hand, tends to focus on more conceptual and subjective elements, such as words, mind maps, phrases, and concepts that define the creative paths of the project. In short, the moodboard is more visual, while the semantic panel delves into the meaning of ideas.

How to present a moodboard to a customer?

The presentation of a moodboard needs to be objective and engaging. Use short sentences, point out each element, and explain how that image, texture, or color contributes to the project concept. Avoid excessive technical terms and try to create a visual narrative, showing how the choices on the moodboard will materialize the customer's dream. It is even worth asking him to say which images attract the most attention, making the moment more participatory. A cool tip is to use platforms like Redraw to display images rendered in real time, increasing the impact during the presentation.

Can Redraw help me create moodboards?

Yes, it can even make it easier, a lot. Redraw was designed precisely for professionals who need to transform ideas into real images, without fuss. You can import references, gather styles, create renderings of specific environments, and explore project variations in a few seconds. Whether your goal is to illustrate possibilities for a client or coordinate team ideas, Redraw allows you to centralize everything in a visual panel that truly reflects the concept of the proposal. No mystery and no need for computers with a hardcore configuration.

What is the difference between a moodboard and a semantic panel?

The moodboard has a more visual focus, bringing together graphic elements, color palettes, textures, and images that express sensations or serve as a compass for architectural creation. The semantic panel, on the other hand, serves to organize ideas, themes, and concepts in a more written form, often composing mental maps, keywords, and direct links with the project's subjective values. The ideal is to use the two together: the semantic panel to organize thought and the moodboard to give visual body to what you want to create.

Where to find references for architectural moodboard?

The key is to vary the research sources! Manufacturer catalogs, image banks, specialized magazines, office portfolios, travel, art, fashion and, of course, the renderings created by platforms such as Redraw are excellent starting points. The tip is to seek references that truly dialogue with the project concept, avoid the obvious and mix international trends with local solutions, innovative materials with classics. Thus, your moodboard will go out of the ordinary and truly surprise.

Conclusion: Turn your inspiration into successful projects with Redraw

Assembling a moodboard is more than playing with gluing digital figurines, it's giving shape to the concept, awakening emotions and creating immediate connections with your audience or client. If you've come this far, you've noticed that creating panels inspired by architecture is one of the smartest strategies to start the project on the right foot, align teams and enchant those who are going to invest in the final result.

Platforms like Redraw came to accelerate, organize, and transform the routine of the most demanding professionals. You save time, impress more, and deliver increasingly surprising projects. And let's be honest, who doesn't like to score points in the presentation and still facilitate the execution of the project later?

The right moodboard sells the idea before the project even exists.

If you want to take your architectural presentations to the next level and truly delight clients and partners, discover Redraw. Experiment, discover the power of artificial intelligence applied to creativity and transform the way of presenting visual projects once and for all. Sign up and start creating moodboards as impactful as the best magazine cover projects right now.

Levantamento arquitetônico
Redraw
18.03.2026

Architectural Survey

Redraw
5 min of reading

The crucial importance of the architectural survey

Architectural survey is that stage that many professionals consider 'boring', but which can be the difference between a project that works perfectly and a work that becomes a nightmare. Let's say it's like having a medical check-up: nobody likes it very much, but it's essential to avoid unpleasant surprises later. Documenting a building that has already been built, with precision and detail, is the starting point of any serious architectural proposal, whether for modest renovations, bold adaptations or technical diagnoses. And, of course, it's worth stressing: all of this only makes sense when we can see the result after the survey. To transform your measurements into realistic images and impress clients, try rendering your scenes in Redraw, which generates 3D visualizations directly from the browser and without a headache!

What is architectural survey and why does every project need it

You've probably found yourself asking, “Do I really need to measure everything again?” Yes. Because building surveying is not a luxury, it's a necessity. This process consists of collecting all the information of the existing property: room dimensions, heights, wall thicknesses, types of openings, frames, finishes, installations, and so on. The objective is to produce a faithful record - and those who have never found a 'crooked' wall or a room outside the square in the work do not know the value of a good architectural register.

The lack of up-to-date architectural documentation almost always becomes a headache when making changes. In addition, NBR 16.636-2 (Yes, there is always a rule to call your own) defines minimum criteria for this survey, ensuring security, clarity and avoiding legal proceedings between client and professional. Without a good survey, any project becomes a guessing game. And for us, nobody wants to rely solely on luck when it comes to construction.

When architectural surveying is mandatory (and when you should do it without it)

Let's get down to business: there are situations in which the measurement of the property is required by law. Some of them:

  • Renovations to listed buildings or historic buildings, required by public agencies
  • Approval of renovations in residential or commercial condominiums
  • Accessibility works, including the adaptation of environments and routes
  • Documentation for regulation with the city hall, notary offices and environmental agencies

But honestly, the law doesn't always have to knock on the door. There are cases in which architectural surveying is not mandatory, but avoiding it can be costly. Changes in hydraulic systems, replacement of coatings, electrical installations retracing the “path of the farm”... All of this depends on knowing every inch of the property. If the idea is to eliminate rework, carry out the detailed survey, even if no one charges.

Complete step by step: how to make a professional architectural survey

Preparation and necessary tools

Here comes the time to separate the amateur from the professional. Before setting foot in the building, gather everything that makes a difference:

  • Steel clamp (conventional and laser, to streamline large environments)
  • Clipboard, sulfite sheets, or sketchpad
  • Pencil, pencil, eraser (pen only for the brave...)
  • Digital or traditional level, ruler and square
  • Photo camera or smartphone

And of course, if your client is one of those obsessed with details, take care and bring electronic equipment, tablets and, who knows, even drones. But... always test your gadgets first and check the battery. Don't underestimate the power of well-used paper and pencils!

Measurement techniques and documentation

“Measuring is easy, measuring right is another story.” The secret lies in the details. Start by demarcating the perimeter, the main piece to avoid drawing a cube when the property is, in fact, an irregular polygon.

  1. Measure each wall individually, taking note of the length, height, and thickness carefully
  2. Identify doors, windows, openings, and other openings and record their exact position and dimensions
  3. Don't forget: stairs, pillars and unevenness may “disappear” at first glance, but create chaos in the project later
  4. Finish by calculating the diagonals, so you can find out if the environment is really a rectangle or just a

All of this organized in simple sketches, filled with indications and arrows. Here, precision is worth more than the beauty of the line.

Photographic recording and technical notes

Forget that phrase that a picture is worth a thousand words. In the world of Render architecture, photo without a caption doesn't save anyone. Capture every corner, coating details, visible installations, and points that deserve attention.

  • Photograph each wall from the front
  • Record the ceiling and floor
  • Include electrical panels, passage boxes, and water points

Golden tip: attach labels and digital arrows to images as soon as possible so you don't get lost later. Some professionals swear that they will remember what that “patch in the footer” was, but months later... no one escapes oblivion.

Levantamento arquitetônico

Modern technologies in surveying: 3d scanners, drones and apps

Of course, today's professional doesn't live on pencils and braid alone. The use of portable 3D scanners has grown, allowing architectural measurement to be digitized in real time, with an accuracy of up to millimeters. Digital models generated in this way can be imported into BIM software, saving hours of rework.

Drones are also allies, especially in large buildings or outdoor areas. Mobile apps, on the other hand, multiply the power of the smartphone to create instant plans from photos and even LiDAR sensing.

  • Advantages of these features? Agility in the field, error reduction and integrated digital documentation
  • Limitations? Cost of equipment, learning curve, and dependence on batteries (yes, always them!)

Still, for most residential projects, the good double braid + paper remains unbeatable in value for money.

Profissional usando scanner 3D e drone em levantamento de prédio

From survey to project: turning data into stunning visualizations

Now begins the part that really shows the client the value of your work. It's no use a bunch of numbers and sketches if the result doesn't enchant those who pay the bill.

After the architectural registration, you model the property using your favorite software: SketchUp, Revit, Promob, AutoCAD... From there, it generates the views, cuts, floor plans, and 3D models. Want to take that next step? Render a realistic scene. And for this, Redraw is a practical solution, since it does not require complex configurations. Just prepare the scene in the software, capture the image or screenshot and process it in Redraw. The result: surprising images, ready to present, sell ideas and win approvals.

Your measurement, your art — but your rendering must impress!

This combination of technical survey precision and impactful visualization is what separates an ordinary project from a memorable experience for those who hire.

Levantamento arquitetônico

How much does an architectural survey cost: price guide 2025

The controversial question comes in: how much to charge? It depends. But, in order not to evade responsibility, see the values practiced:

  • Small residential properties: from R$ 8 to R$ 12/m²
  • Commercial properties or complexes: from R$ 10 to R$ 15/m²
  • Measurements of outdoor areas, warehouses or large condominiums: starting at R$ 5/m²

Of course, risks, travel, time spent, and degree of difficulty are included. And don't forget: if the team uses technology (3D scanners, drones, tablets), the cost will accrue according to equipment and expertise.

Oh, and don't get caught up in the budget tale without a technical visit. Only those who set foot on the spot know how long each measurement will take.

Common architectural survey mistakes (and how to avoid them)

  • Trusting old plants, without conferencing — spoiler: they almost never hit
  • Forget to record room heights, unevenness and ceilings
  • Ignore apparent details, such as pillars embedded in walls
  • Always take measurements from the same point, without checking diagonals (that 'crooked room' says hi to you!)
  • Neglecting the photographic record and ending up exchanging environments at the time of drawing

To avoid these missteps, check everything again before finalizing the documentation. And if something doesn't work, go back there. It's a waste of time just until the headache comes later.

Differences between architectural, topographic and cadastral survey

Not every measurement is the same, although the name sounds like it. See the difference:

  • Architectural survey: measurements of existing buildings, detailing environments, walls, openings, internal installations
  • Topographic survey: focuses on terrain, reliefs, contour lines, boundaries and georeferenced points (NBR 13133)
  • Cadastral survey: detailed registration for legal purposes, such as areas built for regulation with the city hall

Conclusion? Each one has a function and is not a substitute for the other. In complete projects, they are usually complementary.

FAQ - Frequently Asked Questions about Architectural Survey

What is architectural survey?

It is the process of measuring and documenting an existing building in detail, recording room dimensions, door and window positions, wall thicknesses, electrical and hydraulic installations, and other construction elements. It serves as a starting point for renovations, adjustments, or even for researching the property's past.

How to make an accurate architectural survey?

The secret lies in measuring everything carefully, recording it in hand sketches, photographing each environment with notes, checking the diagonals and verifying that each record makes sense. Use trena (preferably laser for large areas), basic tools, and don't rely solely on existing plants. Make revisions after completing each step on site.

What tools to use in architectural surveying?

Steel tape, laser tape, sketchpad, pencil, eraser, level, square, smartphone for photos and, for the most modern, 3D scanner, drone and digital measurement applications. The common sense to decide between paper and technology also never goes out of style.

What is the architectural survey for?

It serves for a detailed record of the real conditions of a building, facilitating renovations, adaptation of projects, regulation with public agencies, approval of condominiums, and even sale or rental of properties. It also provides security to predict costs and plan schedules.

How much does an architectural survey cost?

In 2025, the average cost varies between R$ 5 and R$ 15 per square meter, depending on the type of property, complexity of the service, equipment used and the need for detailing. Lower values tend to involve only large areas or fewer details, while older, detailed properties require a larger budget.

Conclusion: the solid foundation for successful projects

Coming to an end, the lesson is simple: there is no good project without a well done architectural survey. If you want more than complete the table, make a detailed registration and transform your measurements into impactful images. Have you seen how Redraw can catalyze this process? Just capture the scene in your software, send it to the platform and let the artificial intelligence work.

The difference is in the presentation: transform data into renders that win customers!

If you are looking to value your technical work and want to see your projects truly come to life, discover the exclusive resources of Redraw and submit your images to test. Your next performance may be unforgettable.